Hotline đặt Bánh sinh nhật
Hà Nội: 03.666.22.666Cách phủ bánh fondant lâu đài
Hunnie Cake (Lambanhngon.com) - Dạy làm bánh - Đặt bánh cưới, sinh nhật


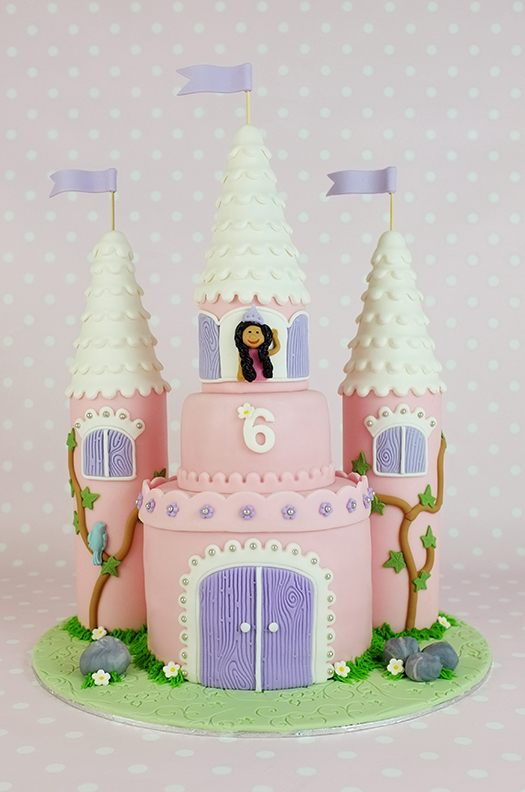

Making the turrets
I used 3 x polystyrofoam cylinders and 3 x cones, approx 3 inches in diameter, purchased from an art shop. (You can also use PVC pipes, paper towel rolls, cardboard cones from craft shops or ice cream cones)

Step 1.
Roll out enough fondant to cover a cylinder. Cut straight edges on three sides of the fondant (top and sides). You may wish to cut a little extra and trim excess away later.

Step 2.
Paint some glue around the cylinder (not the top and bottom)

Step 3.
Simply roll the cylinder towards you, aligning the edge at the bottom of the cyliner (left)

Step 4.
Roll until the whole cylinder is covered and then use a sharp knife to mark where the seam will join. Cut off the excess fondant and join the seam. You may wish to soften the join line by gently rubbing a bit of shortening with your fingers into the line, but I don’t do too much and just face the seam towards the back of the cake.


Step 6.
Stand the cylinder upright. At this stage you can use a smoother to make sure the surface of the fondant is all smooth and wrinkle free. Apply a bit of glue to the top.

Step 7.
Place the cone on top.

Step 8.
Cut out scalloped strips to cover the cone using a straight frill cutter. I start by cutting a perfectly straight line with my wilton metal icing smoother. The strips are about half an inch in width – I use another straight frill cutter as a measuring guide to ensure even strips. I just place it next to the scallop cutter as shown in pic above. You can dust a bit of corn flour on the fondant when cutting out shaped to prevent the fondant sticking.


Step 9.
Apply a thin layer of glue to the cone where the first strip will go.

Step 10.
Stick on the first strip, pressing very lightly with your fingers and making sure you don’t stretch the fondant. Start at the back and go around the cone, cutting the strip where the ends will meet. Apply the next rounds in the same way.


Step 11.
Once at the top, use scissors to cut off any excess. Rub the join lines around the top to smooth out join lines.


I made all three turrets using foam cylinders and cones. The middle turret is cut to size with a serrated knife. You may choose to make the third tier out of cake.

Making the flags
Step 12.
Mix some tylose powder into the fondant you are using for the flags. This will make the flags dry harder and prevent them from drooping. Cut out ribbons approximately 3 inches long and half an inch wide, using a knife or scissors.

Step 13.
Using a wire cutter or strong scissors, cut skewers to about 3 inches in length (the pointy end will go into the turret top). Dab a bit of glue at the straight end of the flag, place the skewer on top and roll the fondant to enclose the skewer. Press lightly with your fingers to make sure the fondant is sticking to the skewer.

Step 14.
Place the flags on the dowels as shown to give the flags some shape and an appearance of movement. Allow to dry completely, overnight or longer.

Making the windows and door
Step 15.
Roll out some fondant for each window. I used a woodgrain impression pad to create the patterns on the fondant. With a circle cookie cutter, cut out a circle. Cut three sides of the circle – both sides and the bottom, leaving the arch at the top. Use the side of a knife to soften the edges of the top edges of the window.


Step 16.
To make the rim around the windows, use a sugar shaper to squeeze out thin tubes of fondant.

Step 17.
Place a strip of fondant in the middle of the window, using a tiny bit of glue to hold it down. Paint a small amount of glue around the outside of the window.

Step 18.
Gently press the thin tubes of fondant around the outside of the window. Easiest to start of on the sides and work around the top, other side and last bottom.


Step 19.
Using the same scallop frill cutter from the roofs, cut a short strip to fit the top of the window as shown below.

Step 20.
Use the end of a thin paint brush to make light indents in the fondant where the silver balls (dragees) will go. Apply a little glue in the indents and press in the balls. It may be easier to apply the balls with tweezers.

Step 21.
Roll out a piece of fondant for the middle window. Start by cutting out a circle like the other windows.

Step 22.
Glue the window in place.

Step 23.
For the shutters, roll out a piece of fondant and create the woodgrain impression as before. Cut out a circle.

Step 24.
Cut the shape in half in the centre and glue into place as shown.


Step 25.
Make the rim around the window using the same instruction as Step 16.
This is the end Part 1. Next is Part 2, where I will show you how to make the princess, how to decorate the turrets and how to put the cake tiers together.
Happy Caking!
Wynona
Các tin cùng chuyên mục
Các bước làm bánh phủ fondant hộp quà tặng giầy cao gót - 07/07/2014 17:33Cách làm hoa Peony bằng gumpaste - 02/07/2014 09:33
Những cách trang trí bánh đường dẻo với tông Pastel hoa đẹp - 27/06/2014 08:00
Hướng dẫn trang trí bánh fondant (đường dẻo) chủ để đại dương - 27/06/2014 07:55
Cách trang trí bánh kem phô mai (Cheese cake) ngon ứa nước miếng - 24/06/2014 10:16
Hướng dẫn làm Ông già Noel bằng dâu tây xinh yêu - 03/12/2013 21:40
Hướng dẫn cách làm chocolate trang trí bánh - 03/12/2013 21:38
Những loại đui thông dụng và cách trang trí bánh khi sử dụng đui - 06/08/2013 08:07
Hướng dẫn cách làm hoa hồng bằng fondant hay gumspate - 27/07/2013 20:29
Hướng dẫn làm hoa hồng fondant và trang trí cupcake - 27/07/2013 20:23
Hướng dẫn cách làm bánh kẻ caro hay cách tạo hình cốt gato bàn cờ hay còn gọi là Checkerboard Cake - 09/07/2013 21:32
Hướng dẫn cách làm hello kitty fondant cake - 08/07/2013 14:58
Hướng dẫn cách trang trí cupcake độc đáo từ fondant - 07/07/2013 20:37
Cách làm cupcake có trái tim nhỏ bên trong tỏ tình - 07/07/2013 20:20
Hướng dẫn làm bánh cuộn bạt chiffon và cách vẽ hình lên bánh cuộn - 05/07/2013 23:16
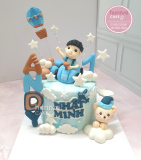
Bánh Sinh Nhật Bé Trai 1 Tuổi Con Mèo – Món Quà Ngọt Ngào và Đáng Yêu từ Hunnie CakeGiá: 850.000 VNĐ
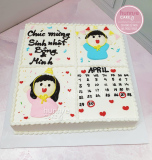
Bánh Sinh Nhật Lịch Tháng: Mừng Tuổi Mới của Bé trai và Bé Gái - Kỷ Niệm Tập Thể Ngọt NgàoGiá: 350.000 VNĐ

Bánh Cupcake Ngựa Thiên Thần và Cầu Vồng: Kỷ Niệm Tuổi Thơ Đáng Yêu Tặng Bé Gái 11520Giá: 315.000 VNĐ
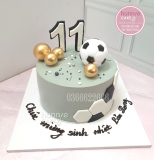
Bánh Sinh Nhật Số 11: Niềm Đam Mê Bóng Đá của Bé Trai 11519Giá: 350.000 VNĐ
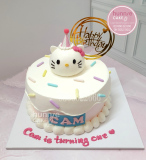
Bánh Sinh Nhật Hello Kitty Dành Cho Bé Gái: Mừng Năm Đầu Đáng Yêu của Cam 11518Giá: 300.000 VNĐ
Dạy làm bánh - Nhận đặt Bánh cưới, Bánh sinh nhật, Bánh Handmade 100% theo yêu cầu - Cung cấp nguyên liệu, dụng cụ làm bánh
Cơ sở 1: Số 65 Ngõ 111 Cù Chính Lan - Thanh Xuân - Hà Nội (Đến số 311 Trường Chinh - Ngã tư sở đi vào) (Xem bản đồ)
Cơ sở 2: Số 10A Tràng An - phường Tân Thành - Thành phố Ninh Bình. ( Đối diện hồ Kỳ Lân) ( Xem bản đồ)
Điện thoại : 03.666.22.666 (Viber/Zalo) - 08.5622.5622 - 0983.002.989 (WhatsApp)
Số TK: 10524948099011 - Chủ TK: Mai Thu Trang - Ngân Hàng: Techcombank - Hà Nội.
Số TK: 0021001040845 - Chủ TK: Mai Thu Trang - Ngân Hàng: Vietcombank - Hà Nội .
Email: hunniecakehn@gmail.com
--------------------------
|
Cửa hàng bánh Hunnie Cake |