Hotline đặt Bánh sinh nhật
Hà Nội: 03.666.22.666Hướng dẫn nặn hình theo chủ đề đại dương
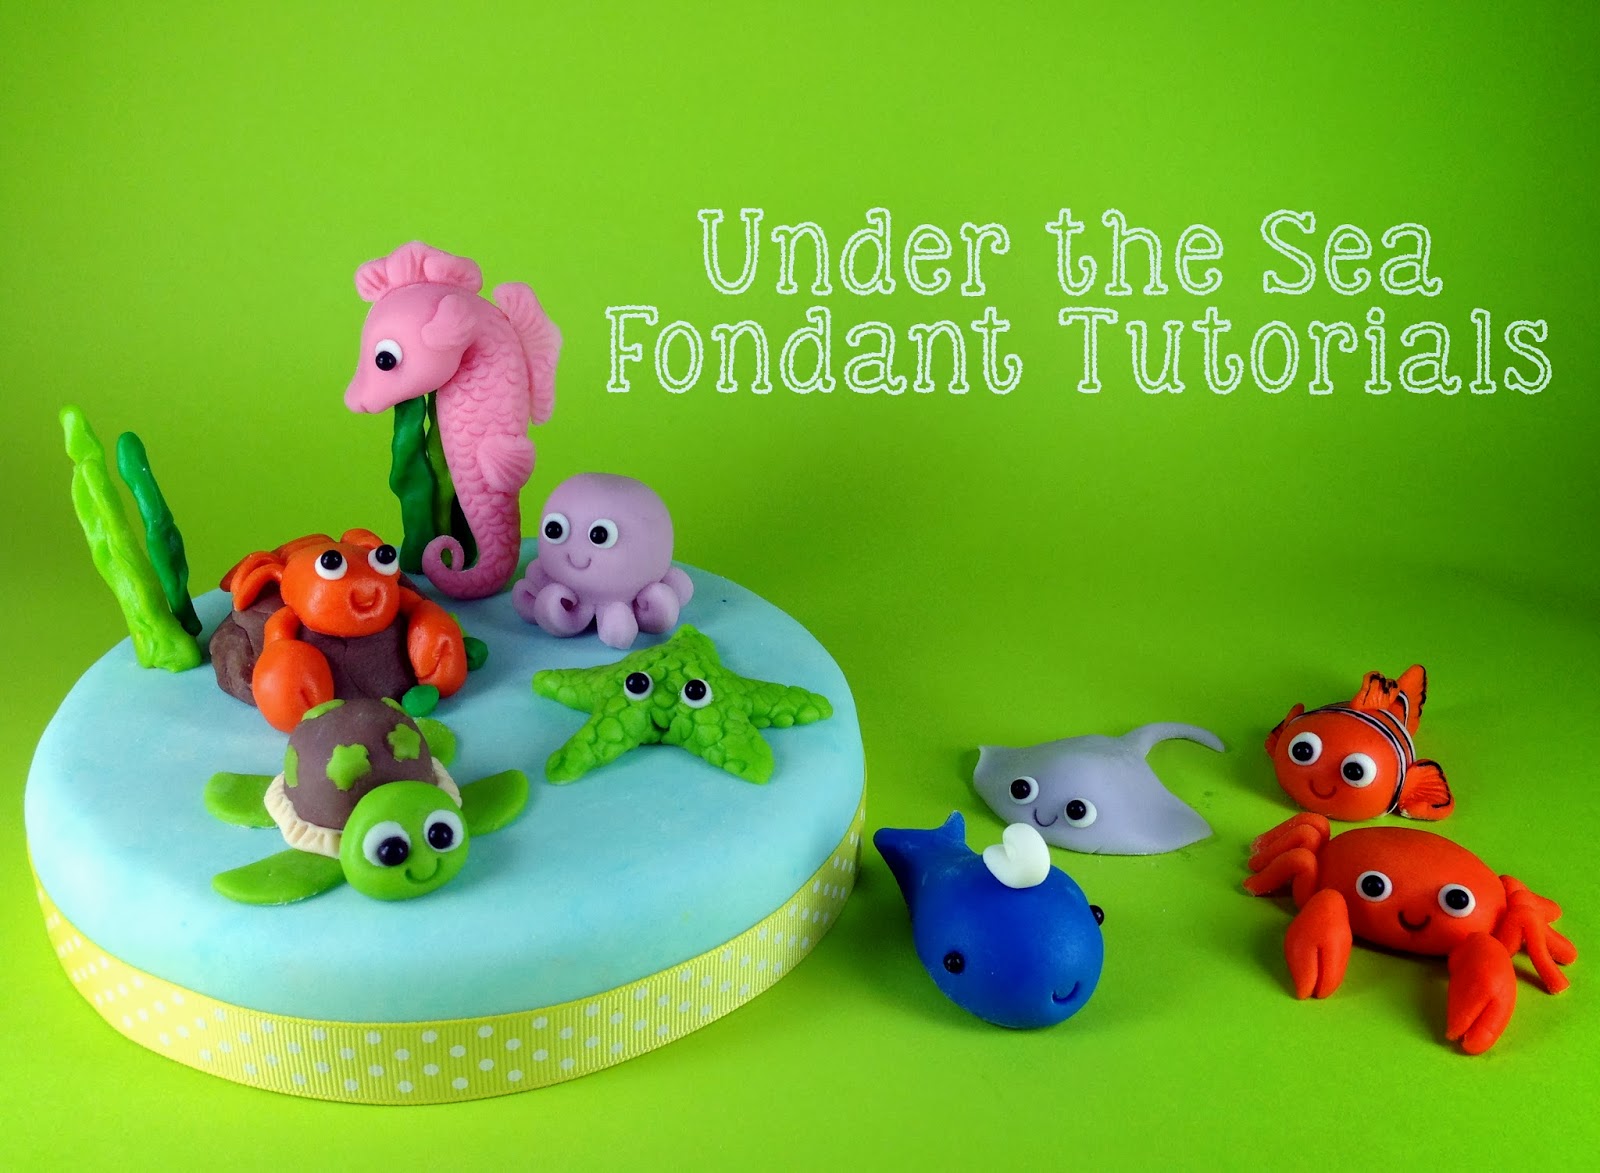
Hunnie Cake (Lambanhngon.com) - Dạy làm bánh - Đặt bánh cưới, sinh nhật


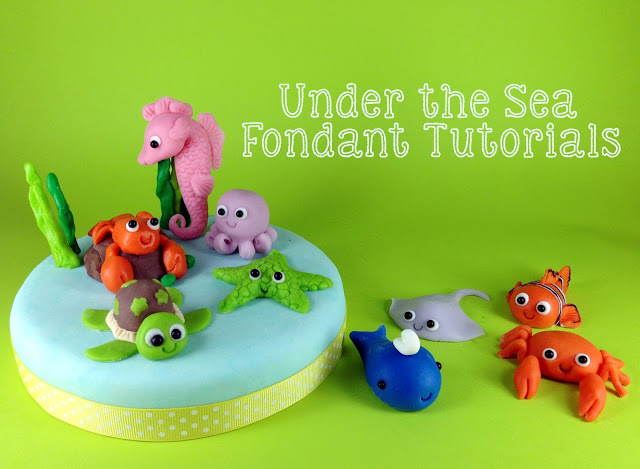
Of all sea creatures I made for this theme, the sea horse has got to be the cutest of them all. I mean, so seriously cute!

by Bake Happy
What we need:
Fondant in pink (or any color you’d like for your Sea Horse), white
Fondant tools (like the halfmoon, the shell and the small ball tool)
Black pearl dragees
Knife
Brush for the gel paste
Water and brush to glue things together

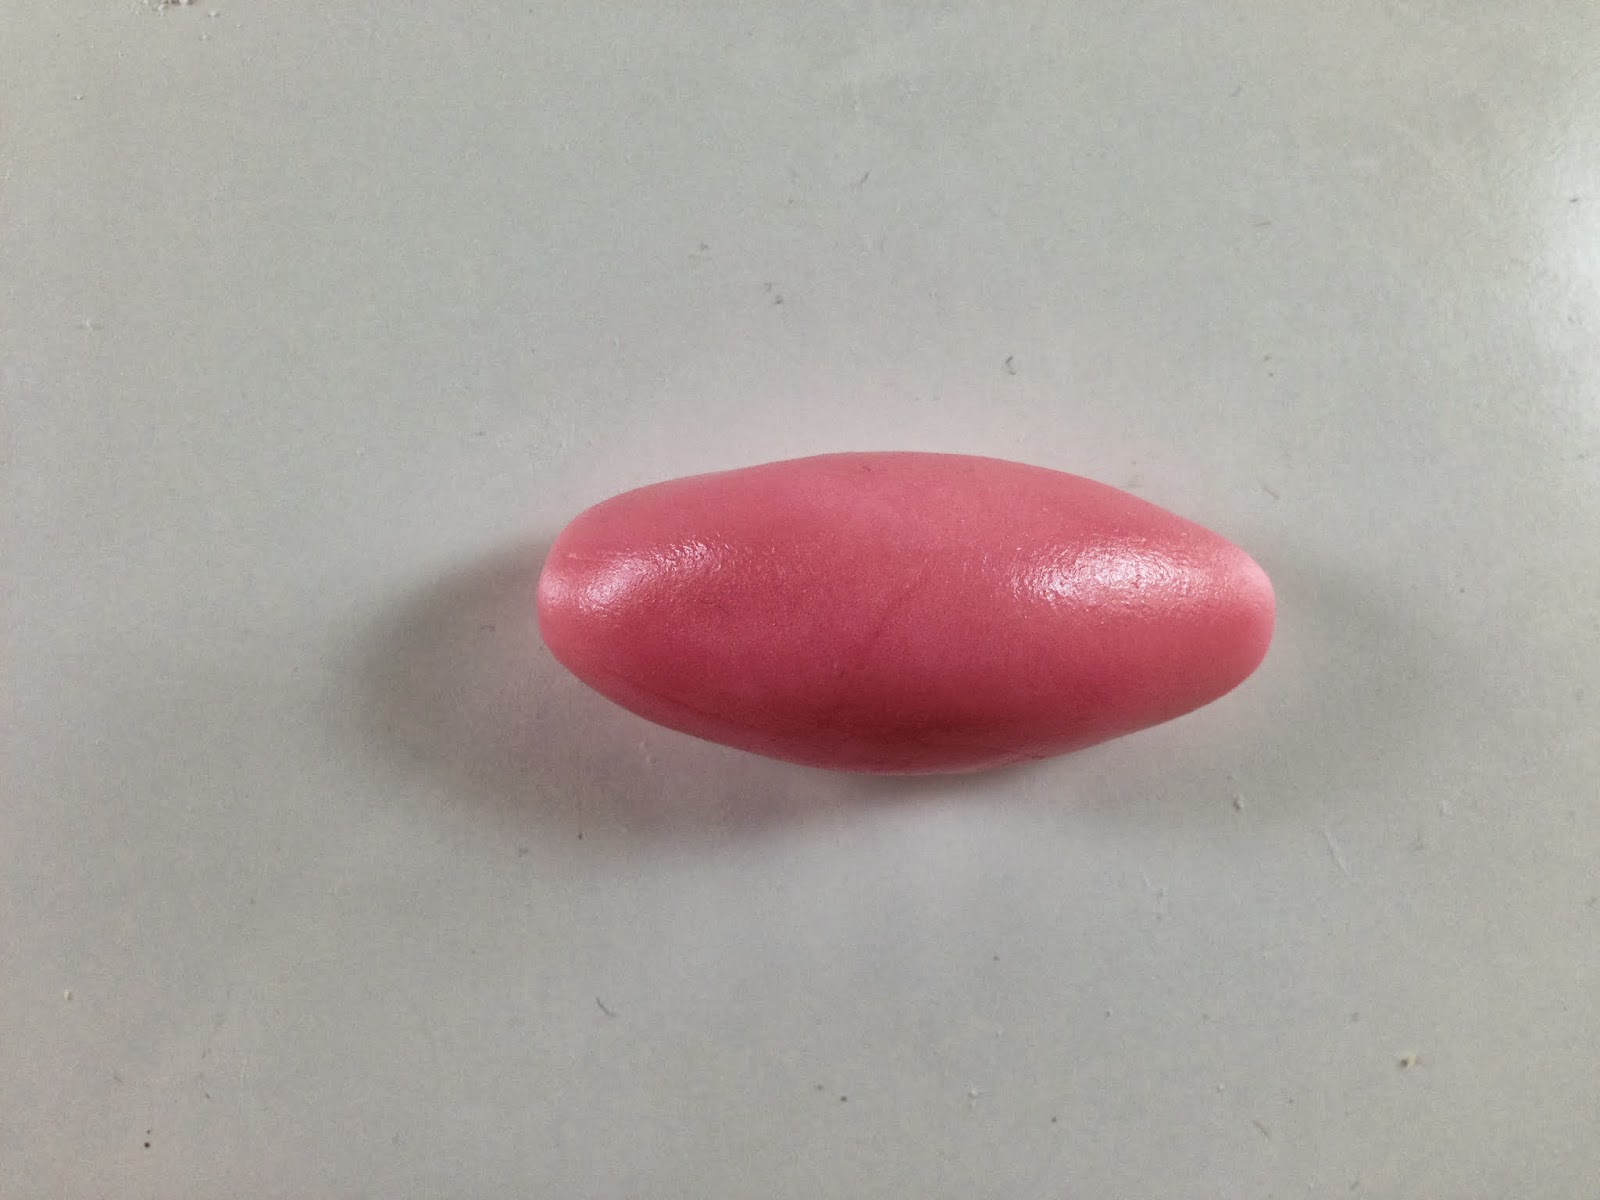
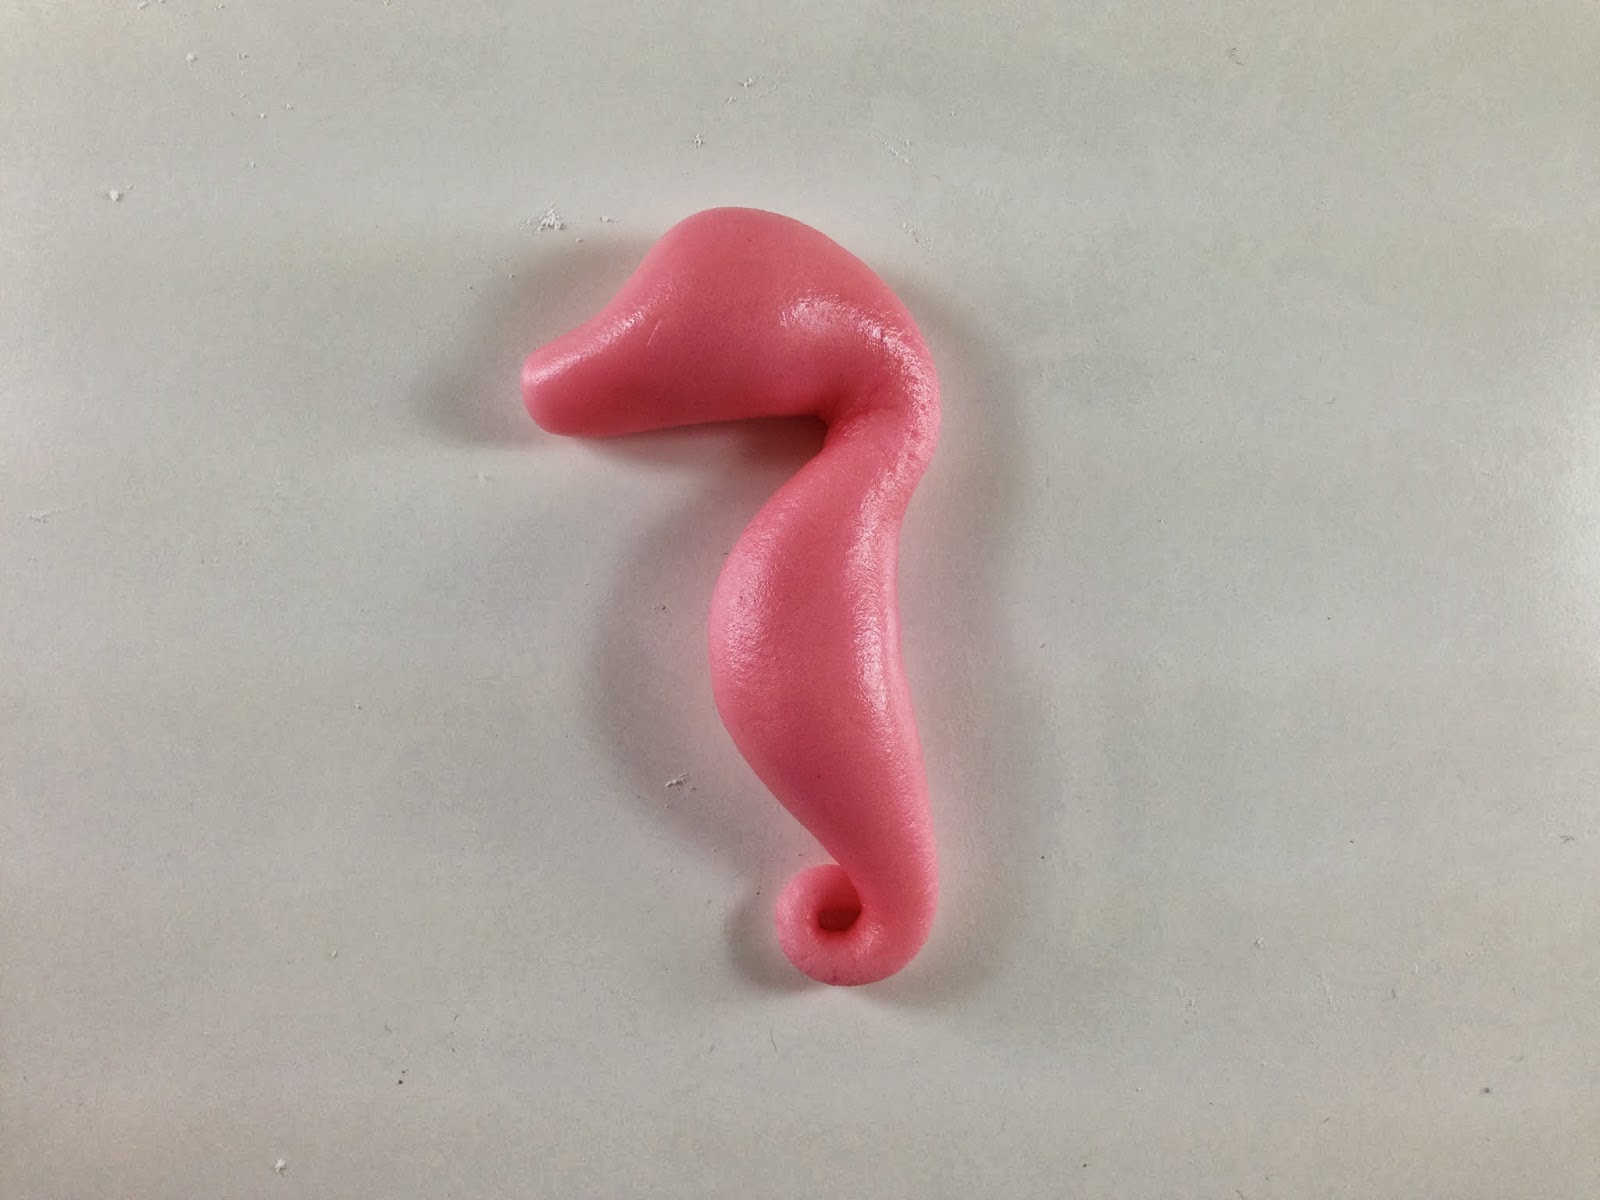
(2) Segment them in two portions, the head and the body.

(3) For the head, shape it like a pear shape. For the body, shape the end like a tail.
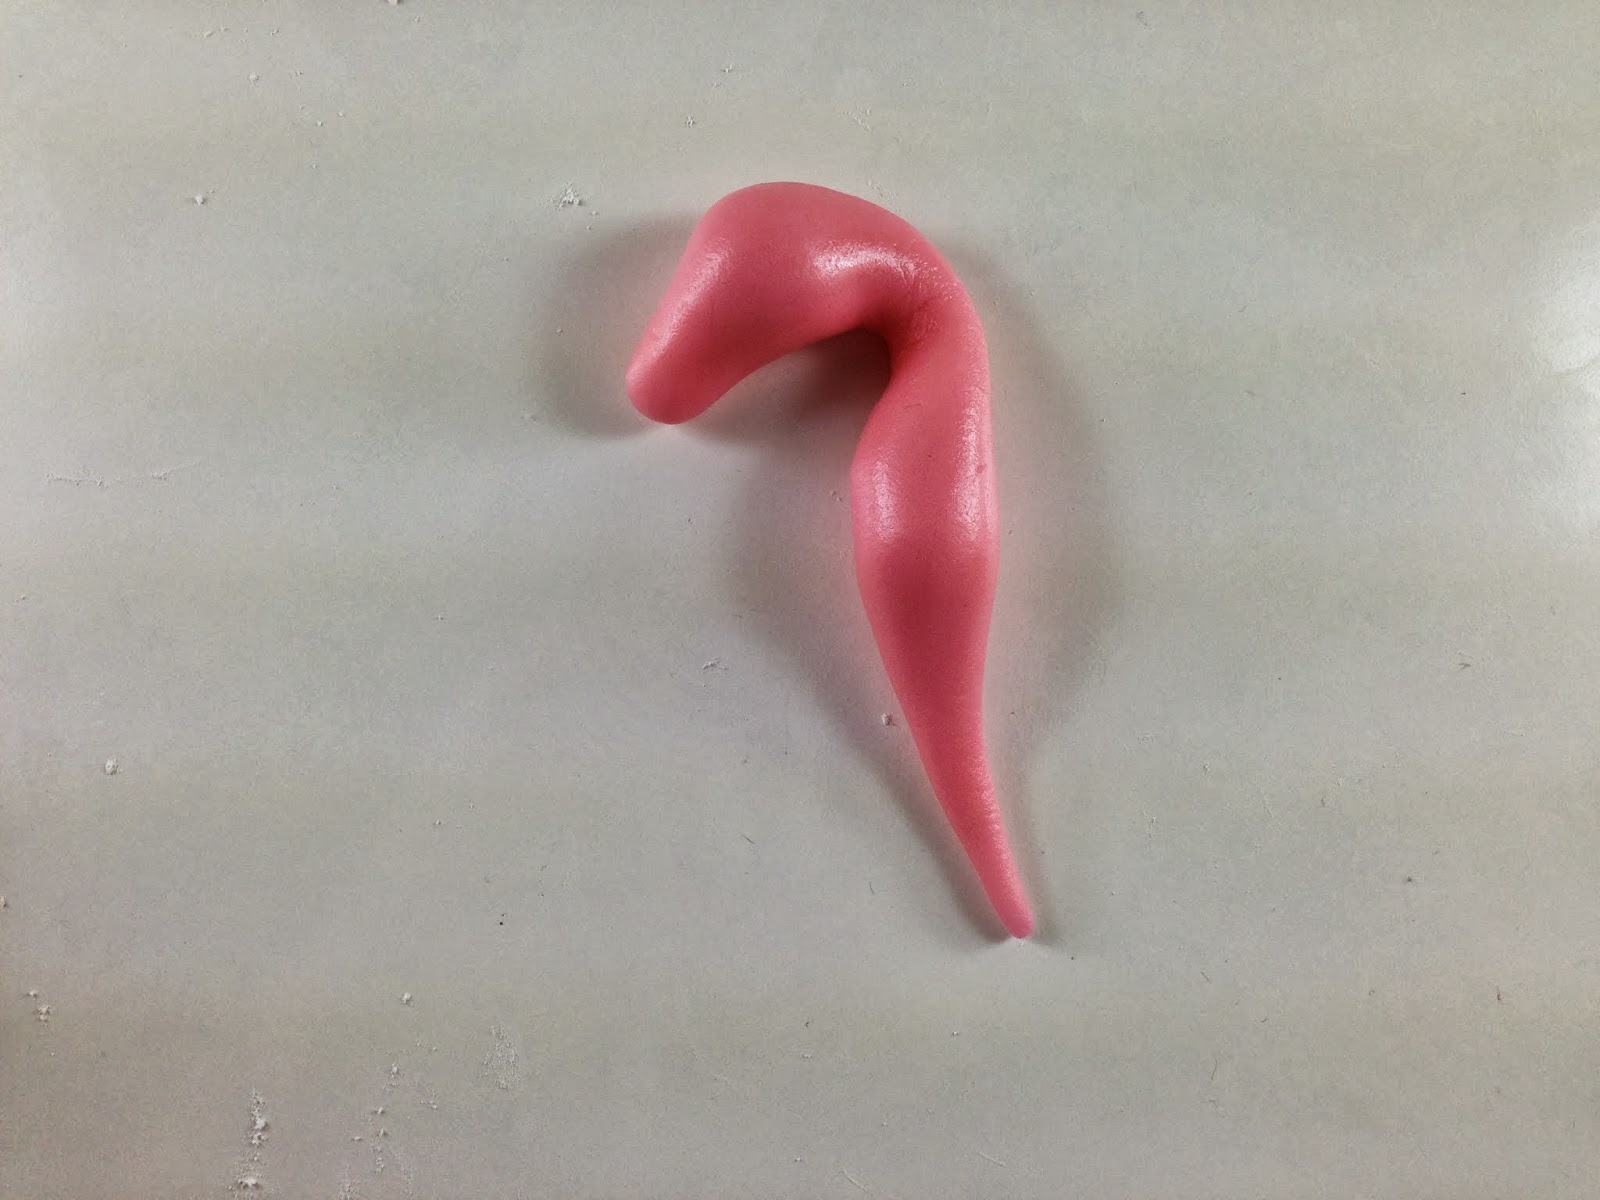
(4) Curl the tail inwards.
(5) Using the halfmoon tool, create a scale-like effect on the body of the sea horse. Roll a small but a bit long cylinder, with one end smaller than the other. Press the shell tool on it. Attach it to the back of the sea horse.

(6) For the fins, roll 2 small orange fondant balls and press the shell tool on it.
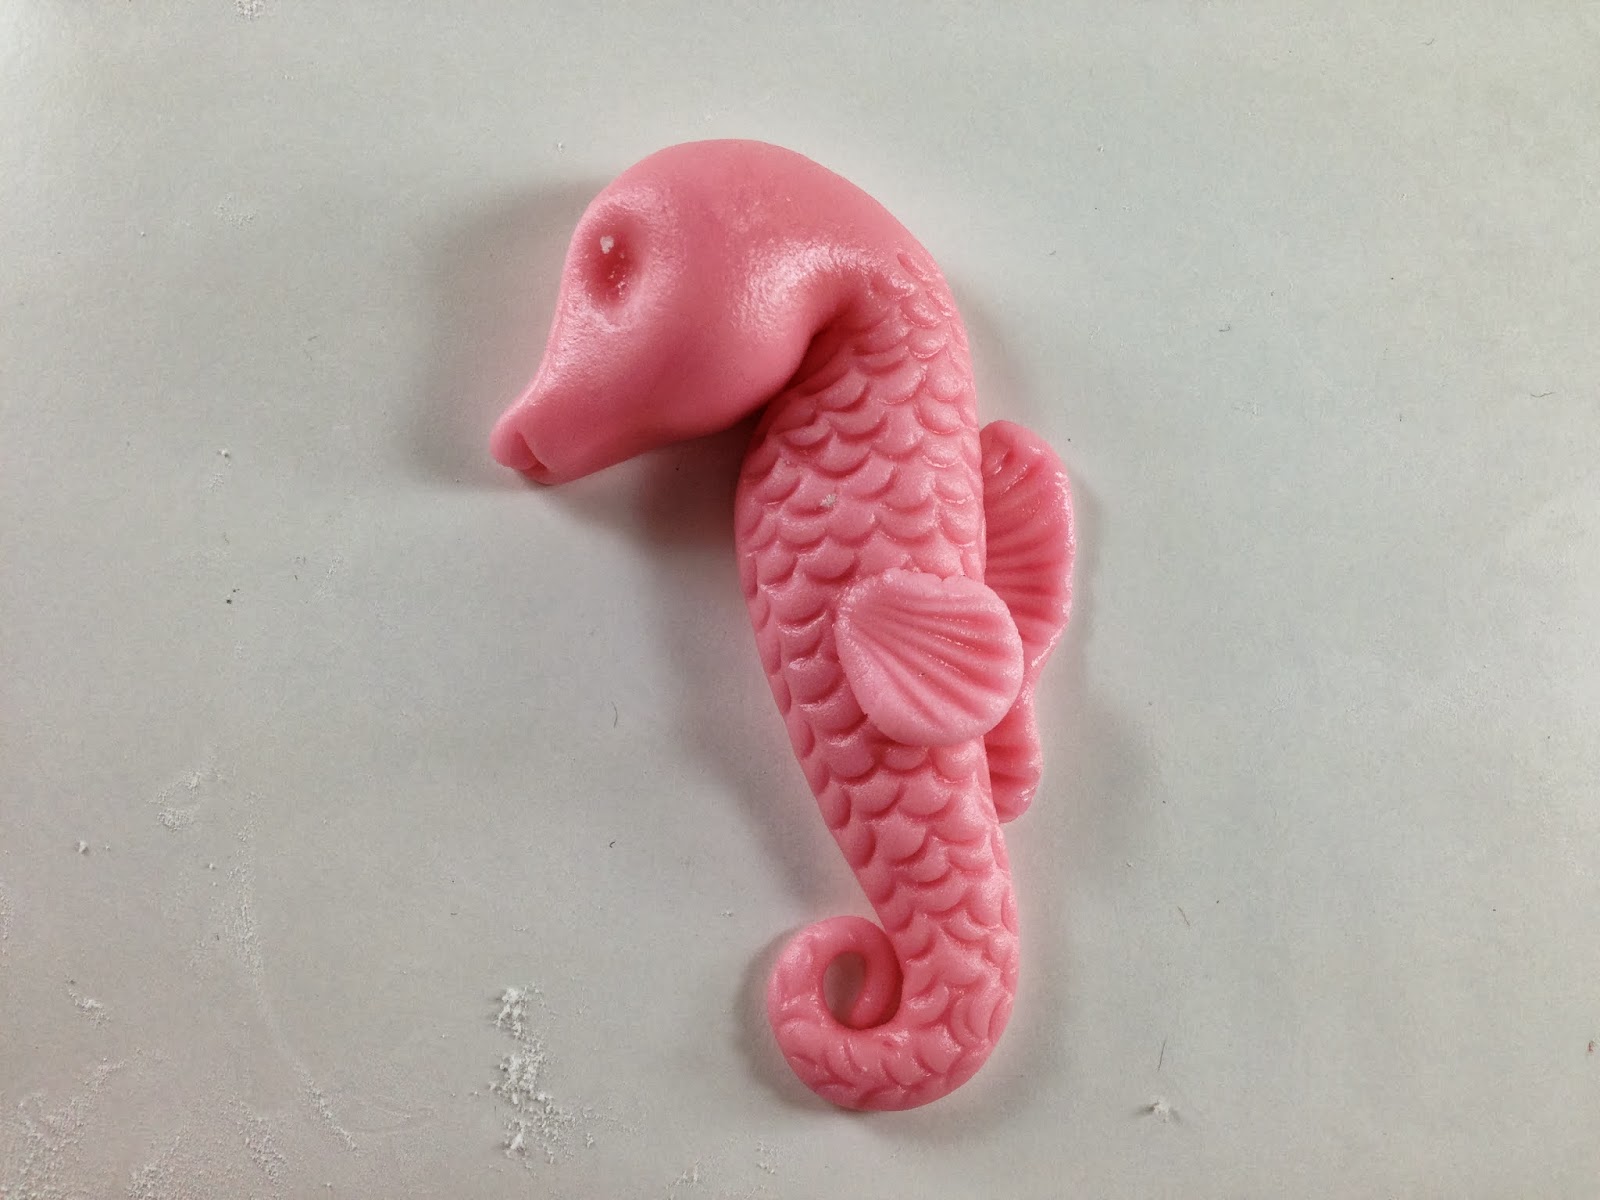
(7) Again, roll a small but a bit long cylinder, with one end smaller than the other. Press the shell tool on it. Attach this on to the back of the head.

(8) Add more details like smle and the eyes.
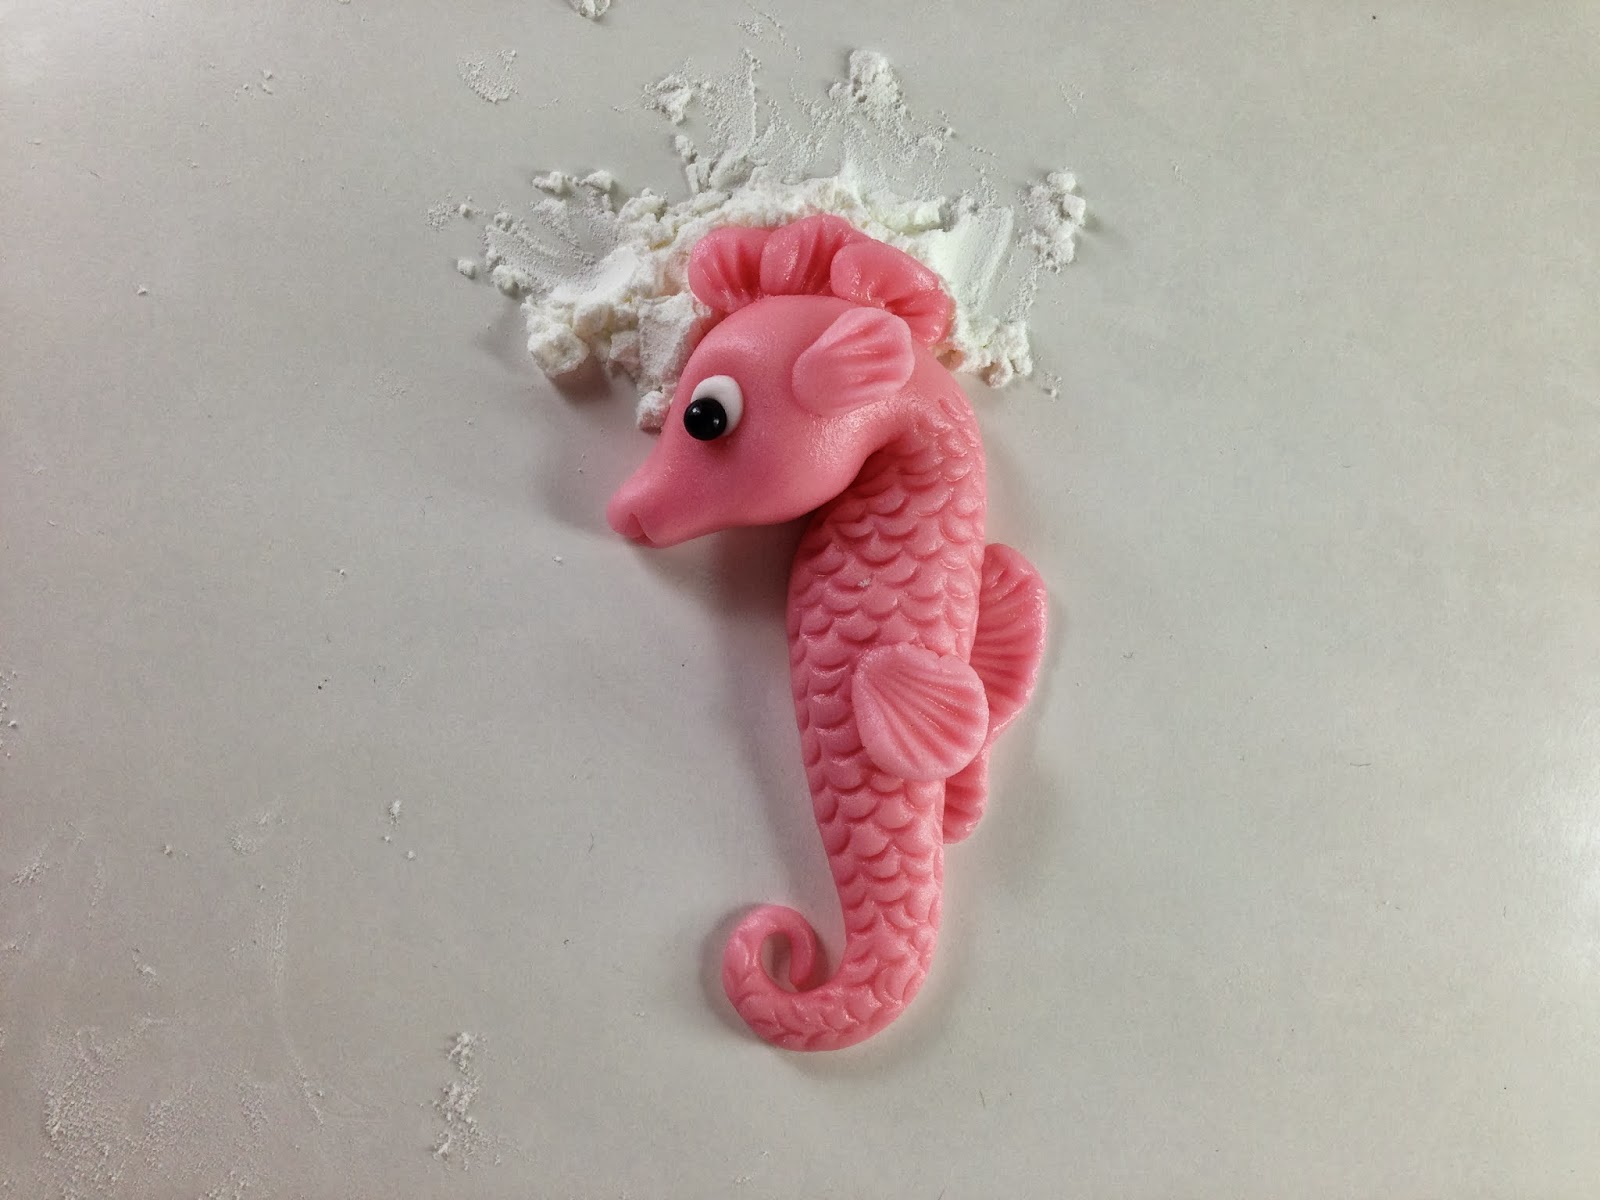
There you have it! Hope you like it, everyone! ![]()
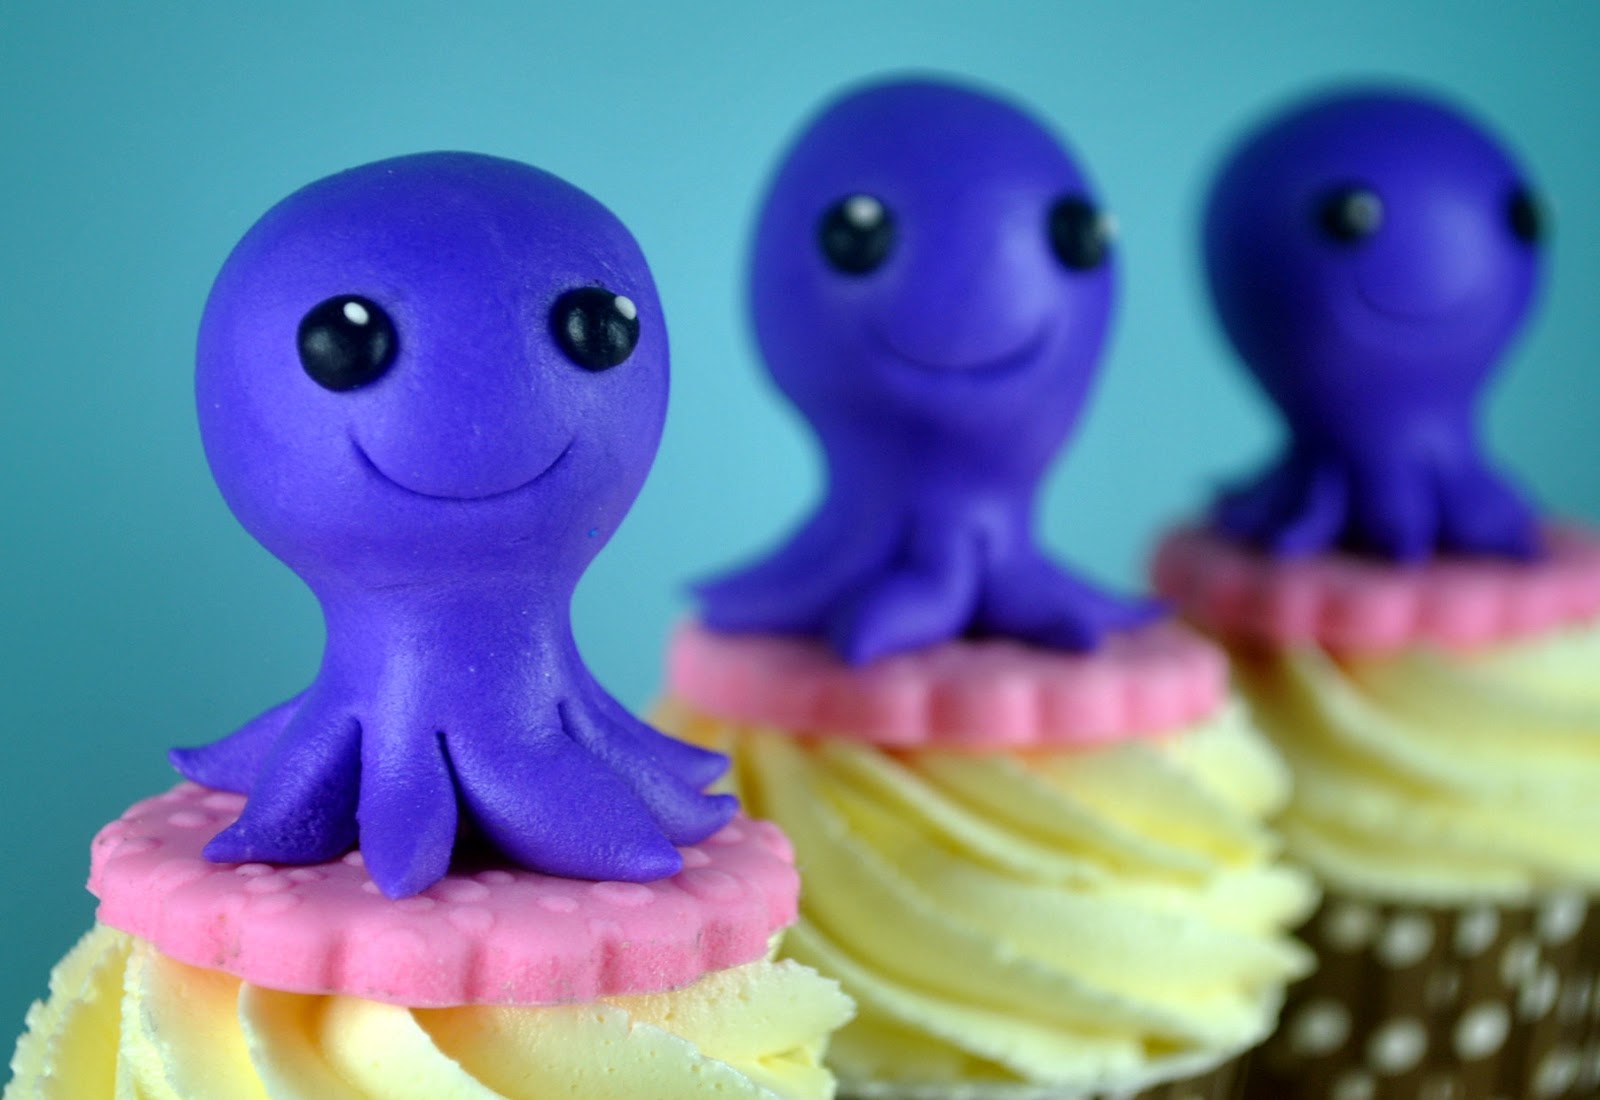

Here’s how:
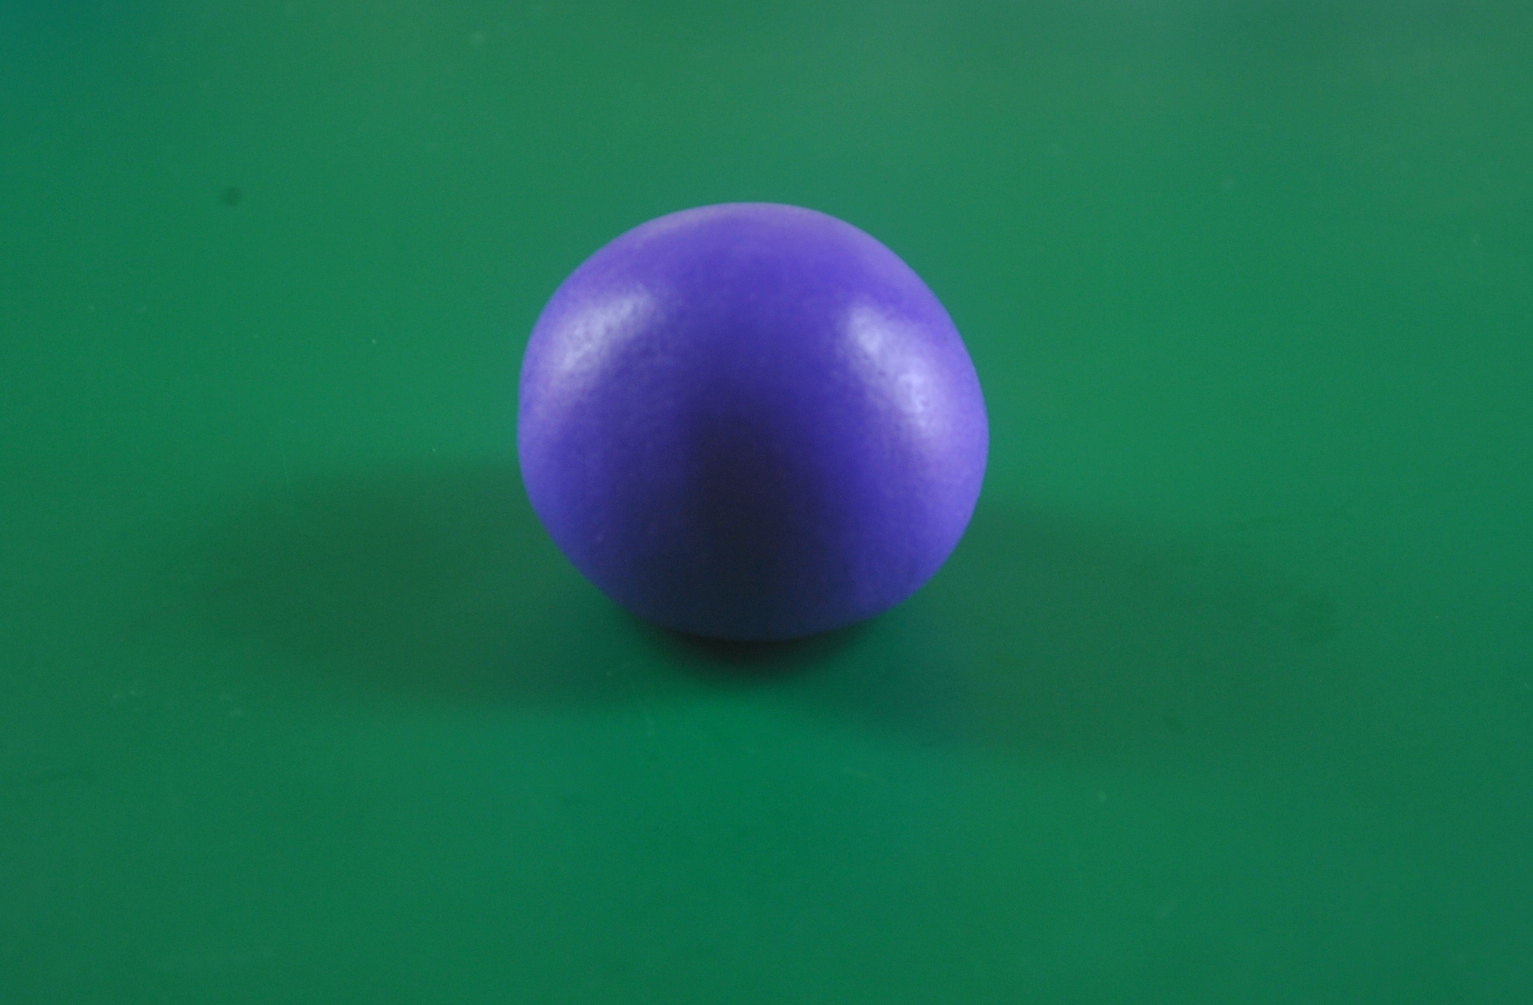
(1) Roll purple fondant in a ball
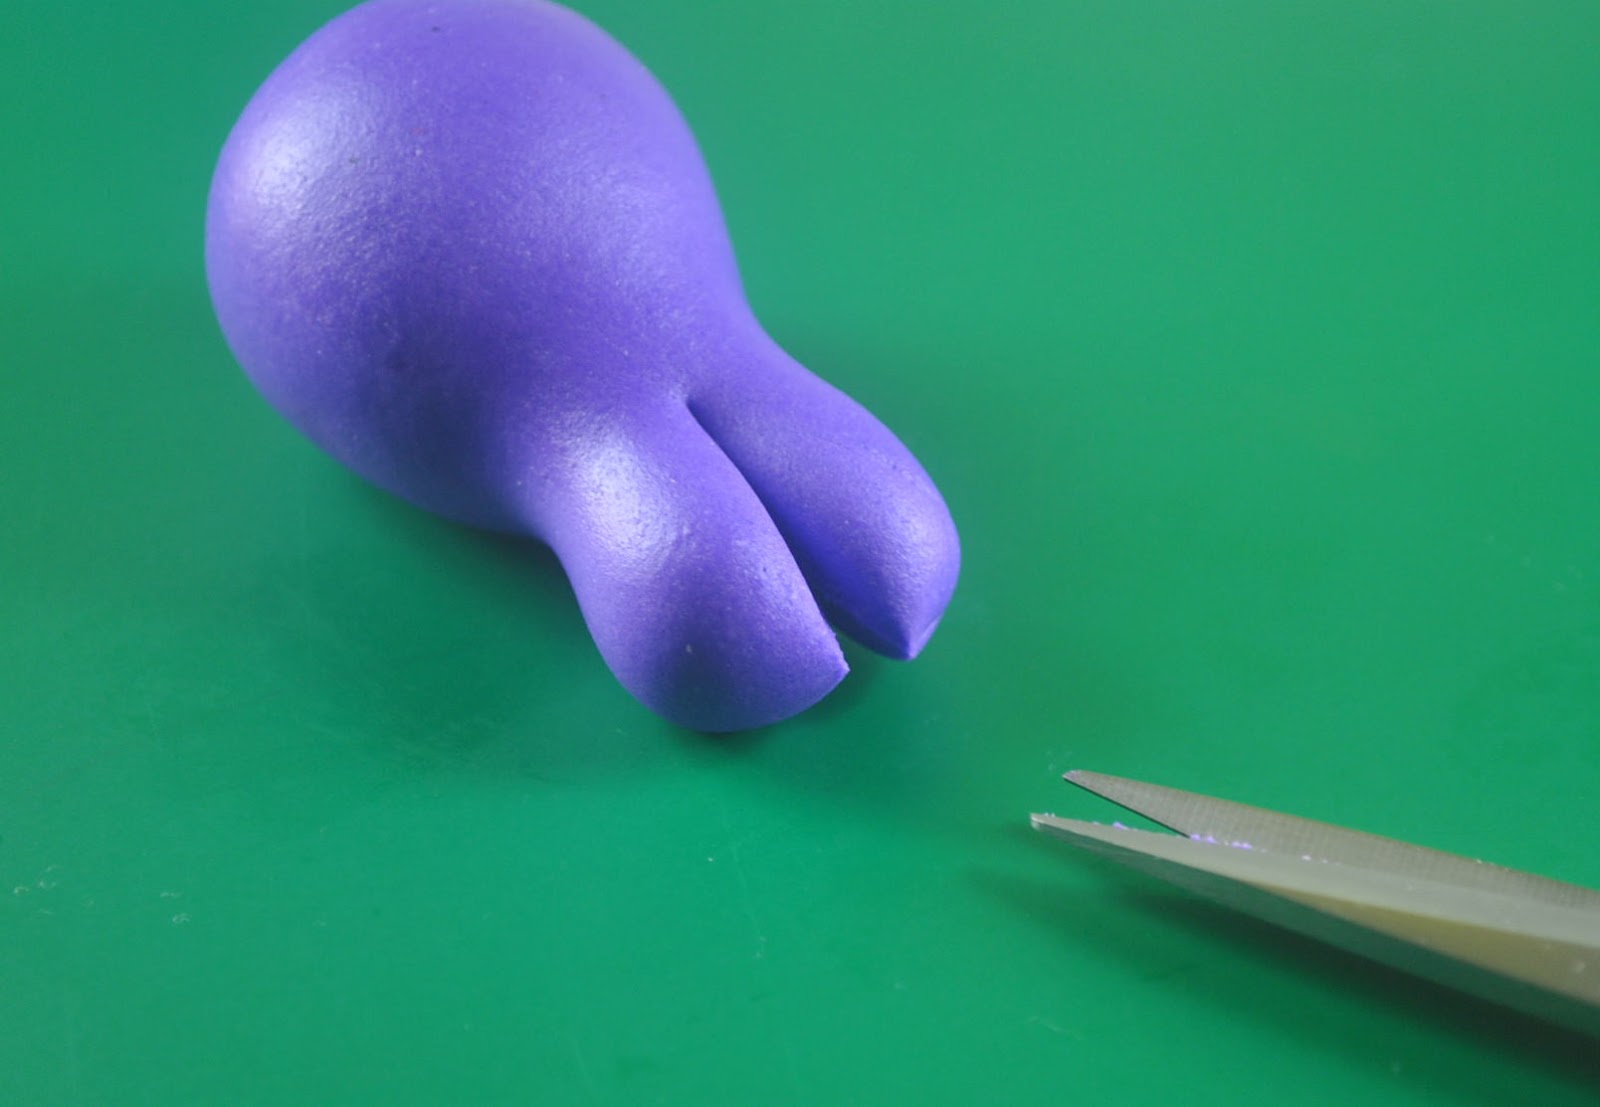
(2) Shape it in a sort of figure eight or sort of a jar.

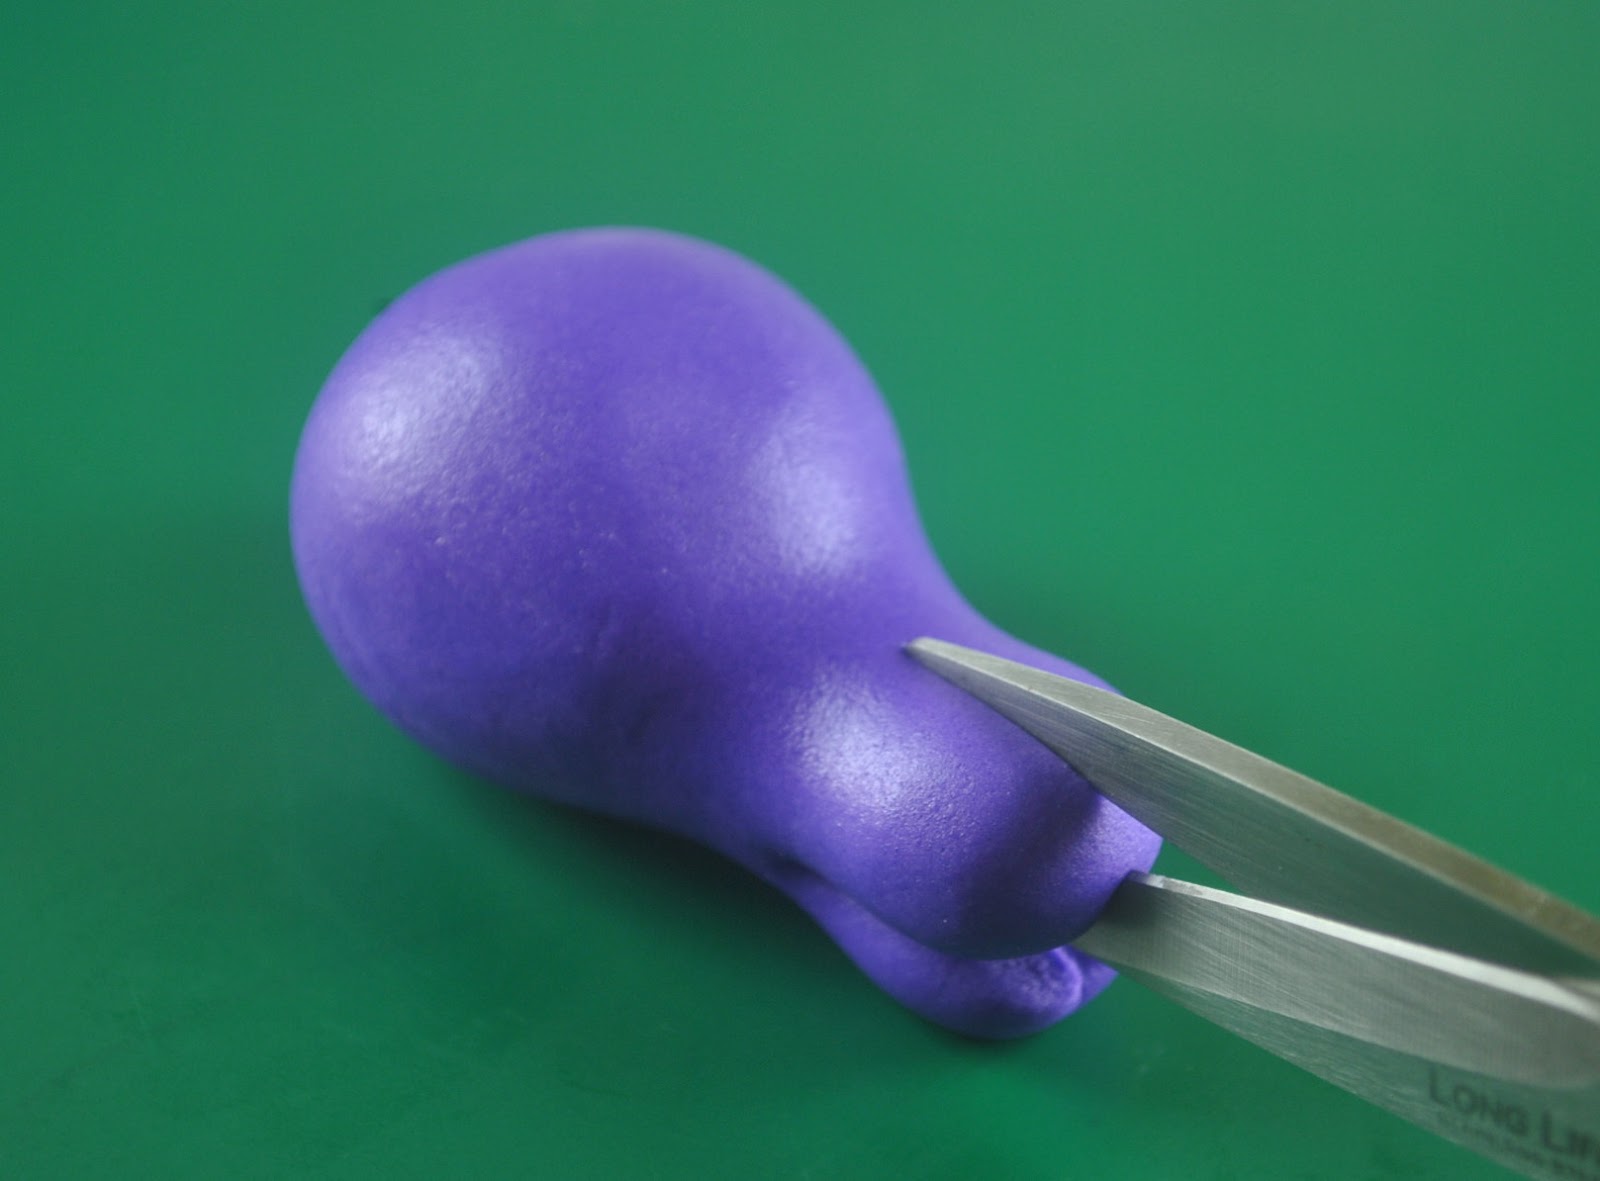
(3) Cut the smaller end into two
(4) Then the two into half again
(5) Continue until our octopus have eight arms
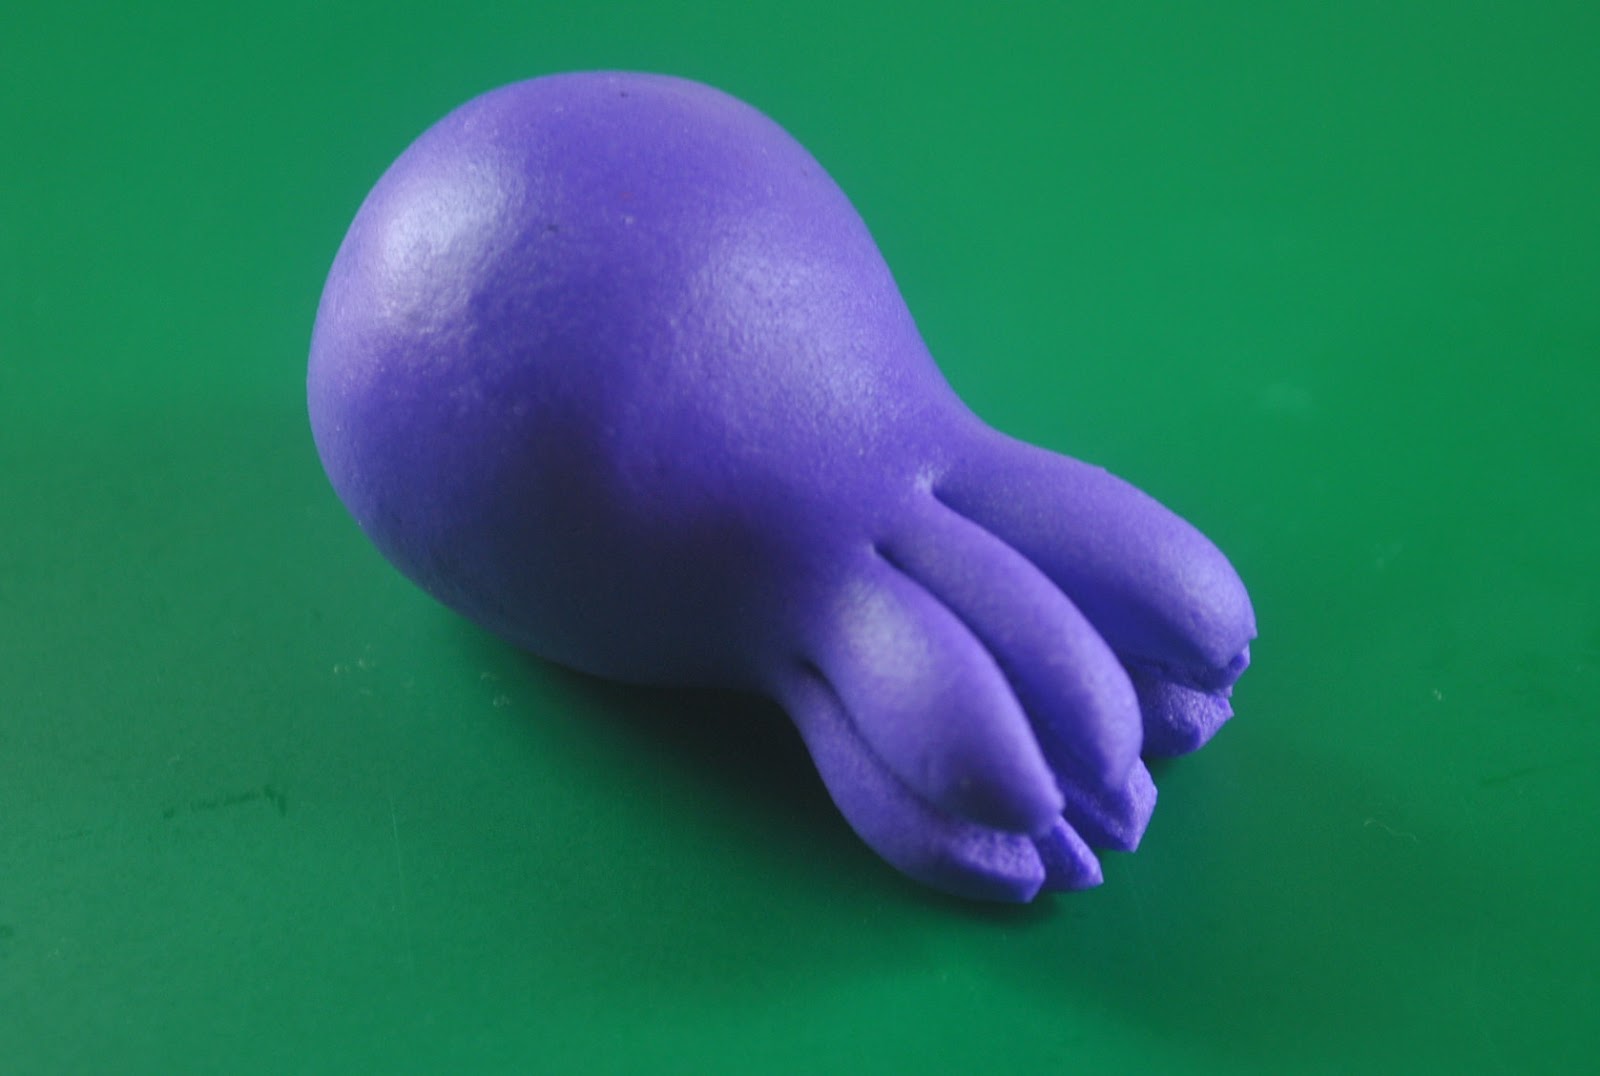

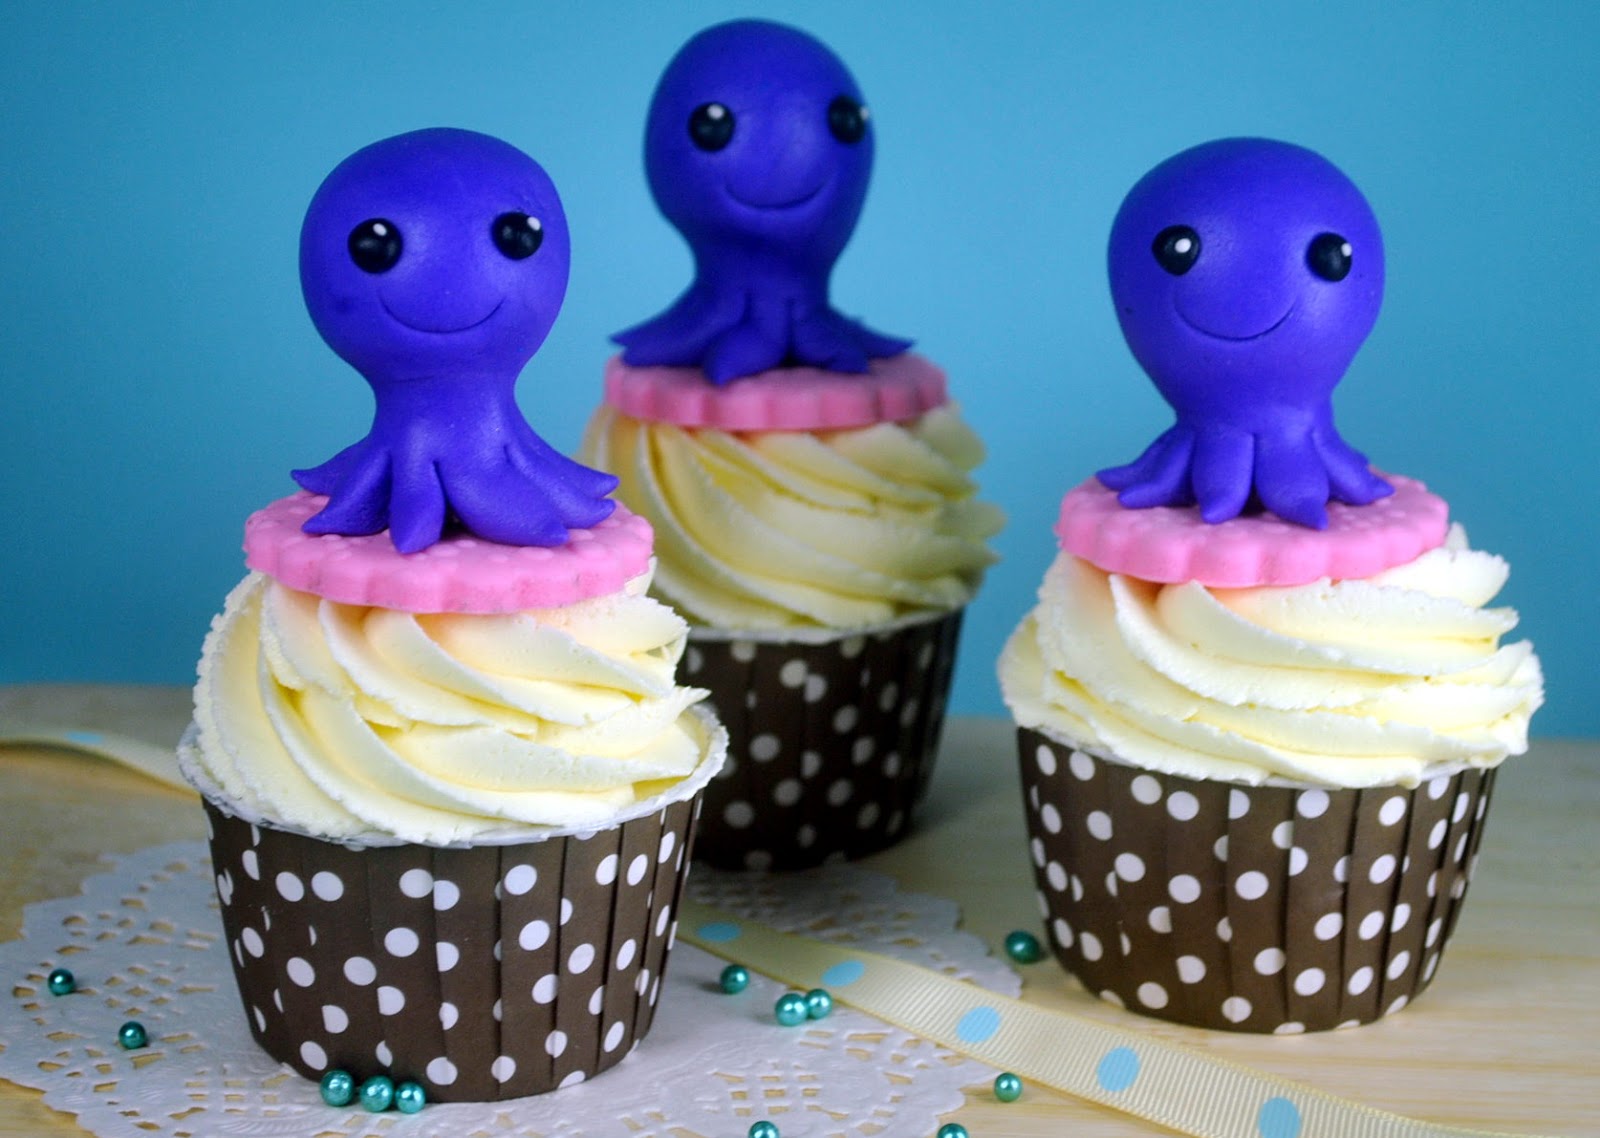
(7) Let Mister Octopus stand and and curl this arms outwards.
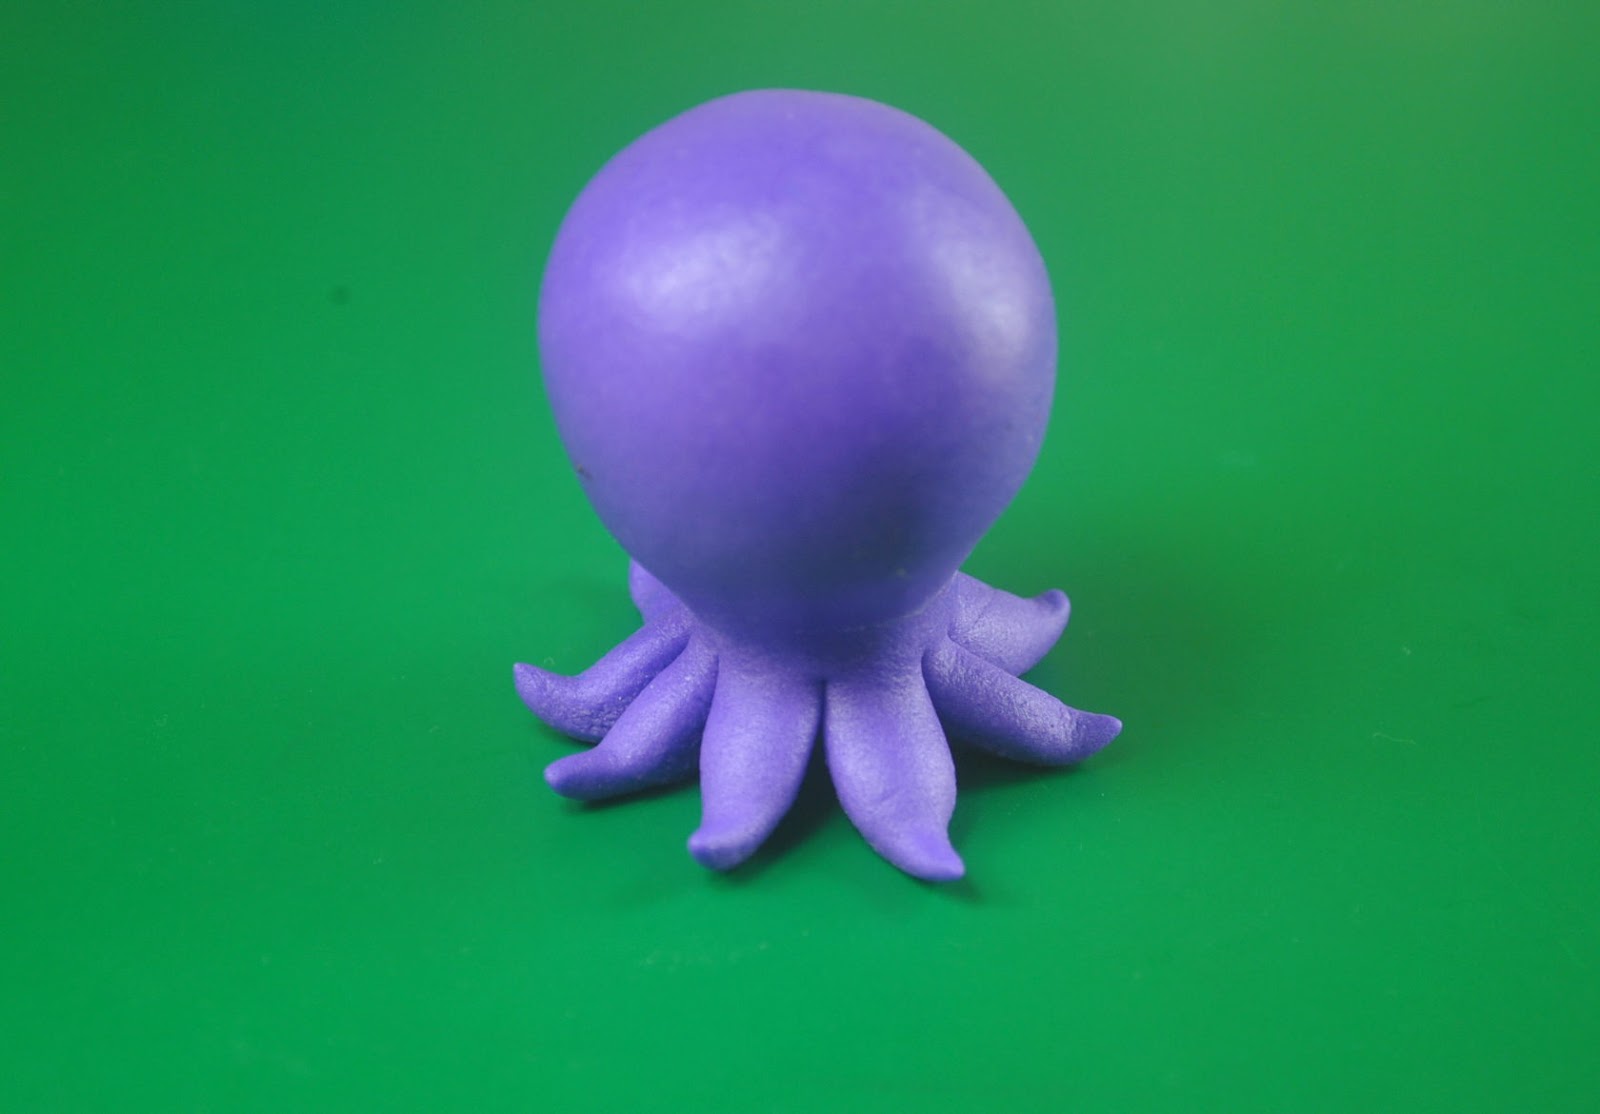
(8) Use the fondant tool to mark where the eyes should be

(9) Add the face details.

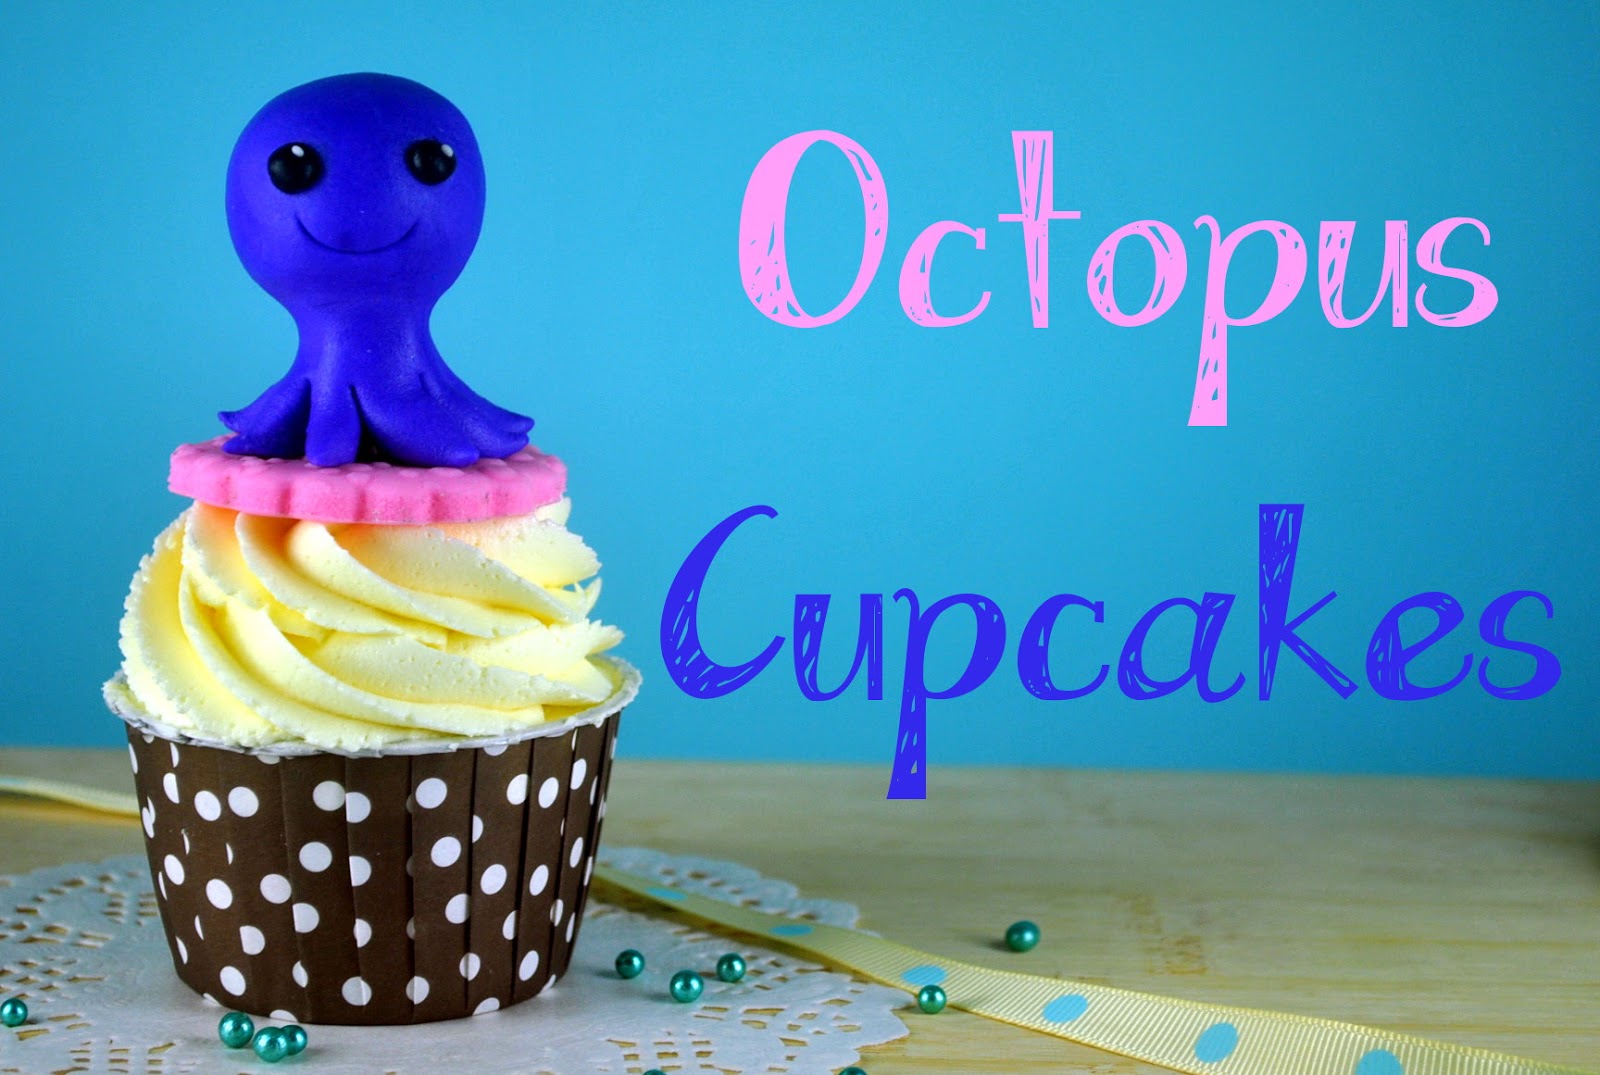
Tadah!! Octopus cupcakes are perfect for under the sea themed parties don’t you think? ![]()
 Hi everyone!
For my first ever Cake Journal post, I thought of showing you how to make a mermaid cupcake topper. You see, it’s almost summer here in the Philippines so what better way to welcome the season than making some mermaid toppers (well… aside from going to the beach, that is).
Here’s the tutorial, hope you would find it helpful, everyone!
This is what I use:
Fondant/Marshmallow Fondant (an alternative is to use gum paste) in flesh-tone, brown, yellow, pink, teal and turqouise
Ball tools (in two smallest sizes)
Half moon tool
Shell modelling tool
Fondant round cutter (about an inch in diameter)
Pearl dragees
Small heart cutter or plunger
Small round piping tip (#7)
Rolling pin
Brown gel paste
Small white sprinkles
Luster dust in emerald (optional)
Tylo glue (here’s how to make it)
Fondant smoother
Knife
Cocktail sticks
Brushes (one fine for the face details and one for attaching fondant together)
 Step 1:
Shape teal fondant into a cone. Set it down and press it flat using a fondant smoother. With the knife, make two indents and bend the narrow end towards the right. This will be the mermaid’s tail.
 Step 2:
Make five indents near the waist part to make bend it easily then make the mermaid’s tail sit up. Roll the ball tool on top to create a dent. Press half moons on the mermaid’s tail using the #7 round piping tip to create the fins. Roll flesh-tone fondant into a cylinder (think big marshmallows). Attach it on top of the tail.
 Step 3:
Roll some pink fondant and attach it onto the waist of the mermaid. Cut out two small hearts and press the knife gently through it to resemble sea shells. Set aside the two small hearts aside.
 Step 4:
To create the hands and shoulders, shape the flesh-tone fondant into a long sausage. Press one end (leaving just a small part) back and forth to create a dent all around. Flatten the rounded end part and cut a “v” at one side. Rub the “hands” to soften cut edges. Press knife into the the fondant to create the fingers. Do the same to the other hand. Attach it to the top of the pink fondant then glue the two hearts to make the mermaid’s top.
 Step 5:
To create the fins, cut a circle from the teal fondant and divide it into two. Pinch one end of a half circle together then press the knife gently through it to resemble fins. Do the same for the other half circle.
 Step 6:
Add a pearl dragee on the center of the mermaid’s top and attach the fins to the end of the mermaid’s tail.
 Step 7:
Roll the teal fondant into a long rope and attach it to where the mermaid’s tail meets the waist. Press the shell modelling tool into the rope to create a design.
 Step 8:
To make face, roll the flesh-tone fondant into an oval. For the nose, roll a small amount of flesh-tone fondant in a ball and paste it into the center of the oval. Make the mermaid smile using the half moon tool. Create eye sockets using a small ball tool and add the eyes using the brown fondant. To add details, paste a white sprinkle to each eye then add eye brows and eye lashes using a fine brush and brown food color. This is a simple fondant face we made. If you want to make an intermediate version of a fondant face, here’s how.
 Step 9:
Using a cocktail stick attach the face to the mermaid’s body.
 Step 10:
To make the hair, roll some yellow fondant (or any hair color you want) into a circle and attach it to the mermaid’s head.
 Step 11:
Add some bangs and run the knife through the hair to add some details. Brush the tail with some emerald luster dust to give it a little sparkle.
 This cute mermaid topper can also be used as a cake topper for an Under the Sea themed party.
Hope you like my first tutorial here on Cake Journal! More to come!

Happy Caking!
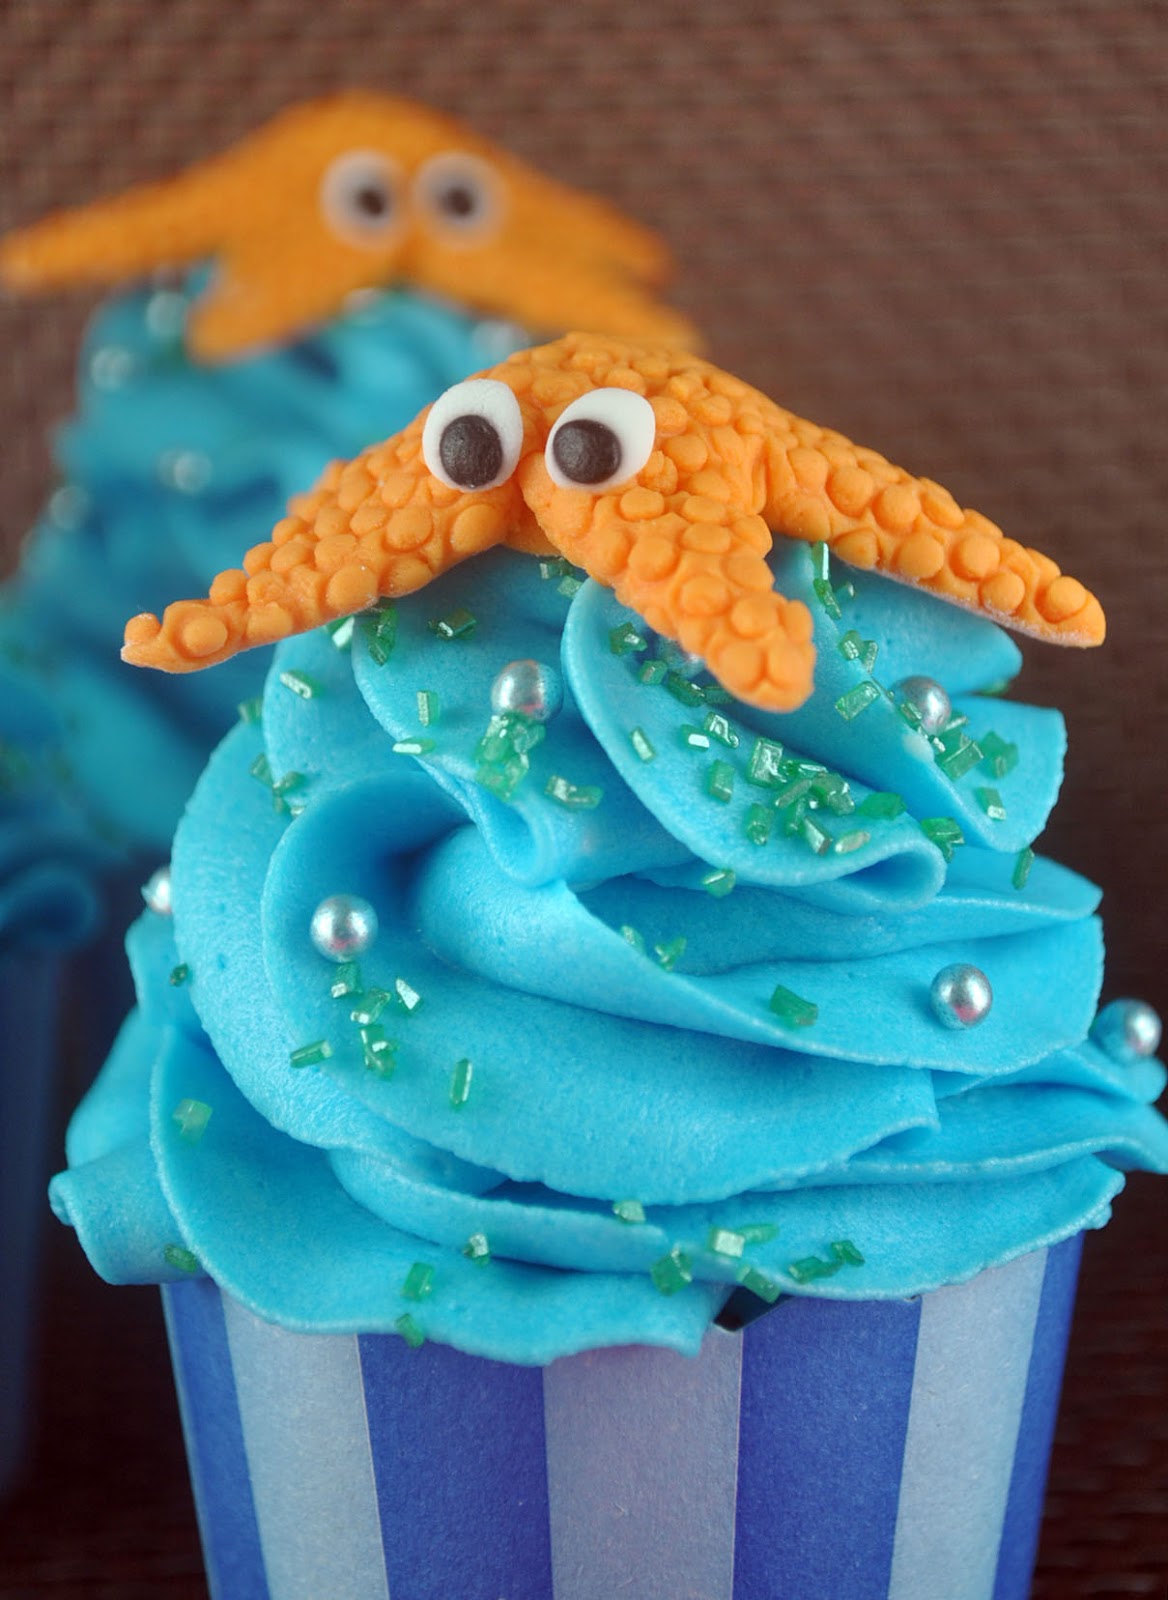
Because if there is no one (absolutely no one) is spending summer fun in October then you probably think I am weird. Yeah, weird in a sense that instead of posting something Halloween related, here I am posting a tutorial on summer themed cupcakes – how to make starfish cupcakes.
Talk about taking the road less traveled ![]() But if you’re waiting for some Halloween themed ideas, don’t worry, there will be some. But for now, let’s re-live the glory days of summer by making these starfish cupcakes.
But if you’re waiting for some Halloween themed ideas, don’t worry, there will be some. But for now, let’s re-live the glory days of summer by making these starfish cupcakes.

An added treat for this theme is that I already have existing tutorials already posted like the fondant or gumpaste (depending on what you want to use) mermaid, octopus, starsfish and whale. Can’t wait to share with you friends the rest of the sea animals we’re making for the Under the Sea Theme! First up is a cute fondant clown fish tutorial. Here’s how –
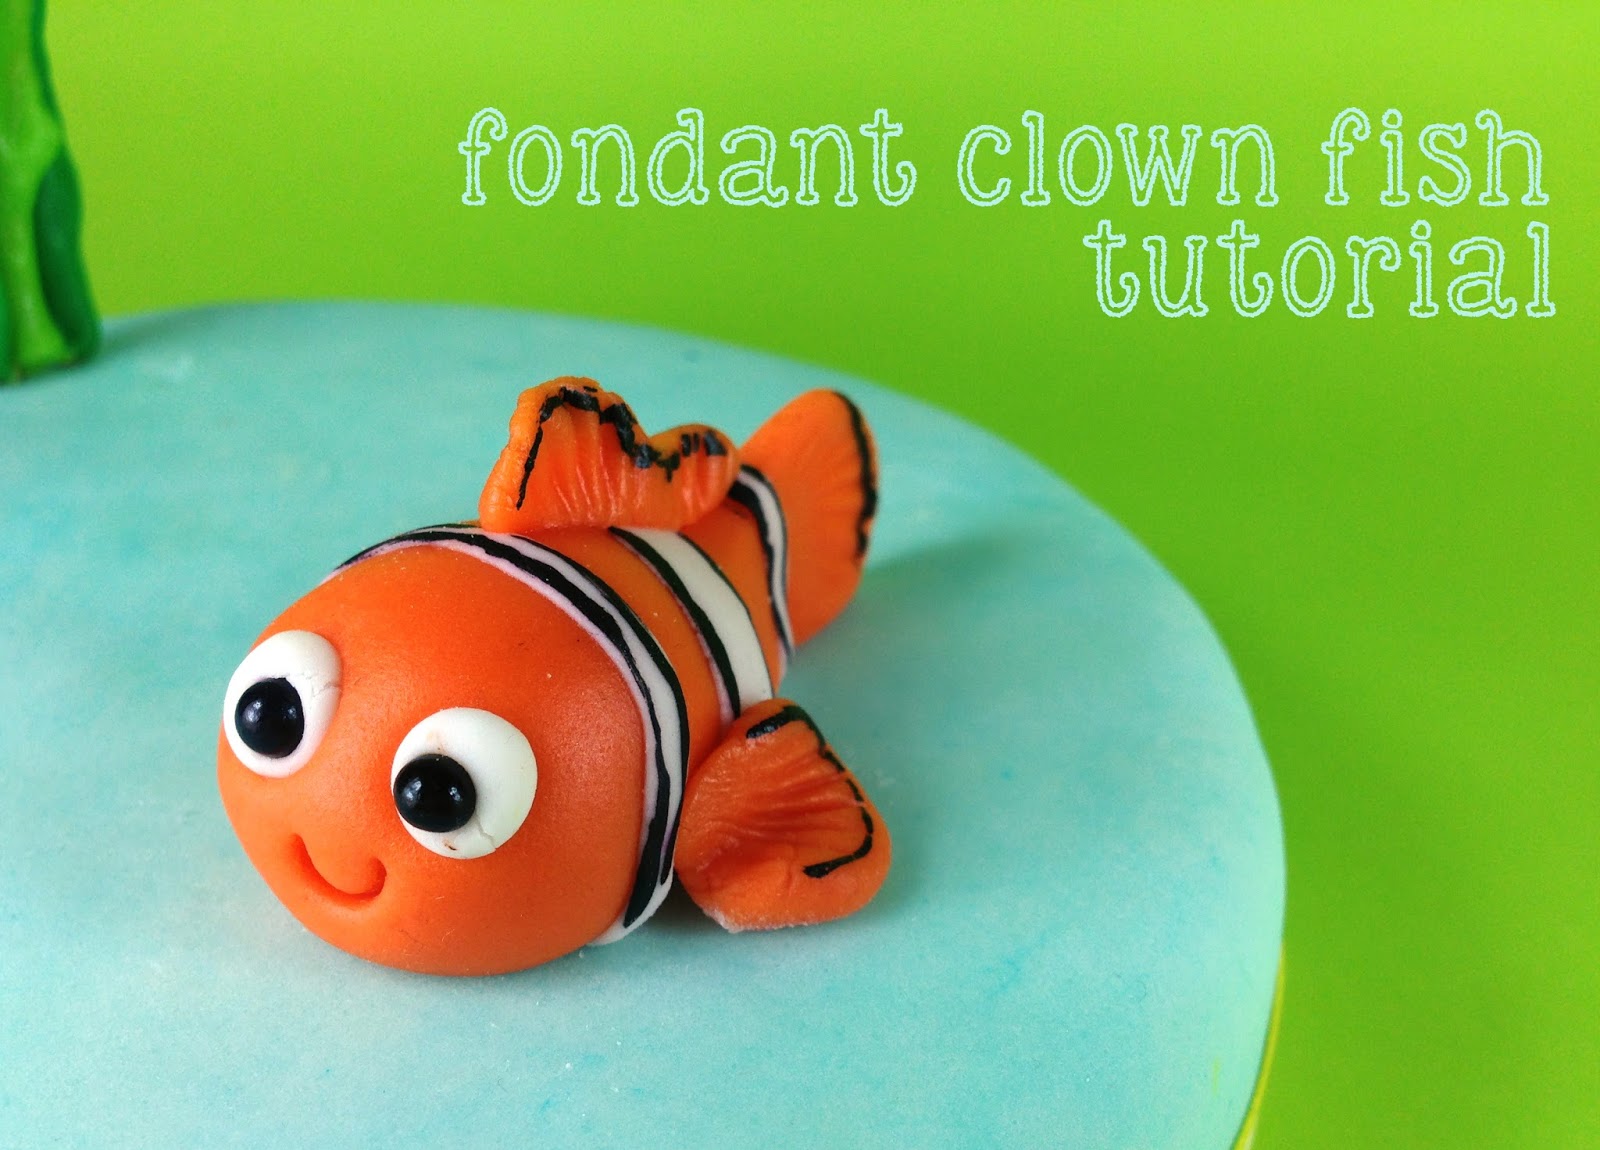
Fondant Clown Fish Tutorial
What we need:
Fondant in white and orange
Fondant tools (like the halfmoon and the shell)
Black pearl dragees
Knife
Black gel paste
Brush for the gel paste
Water and brush to glue things together

Here’s how:
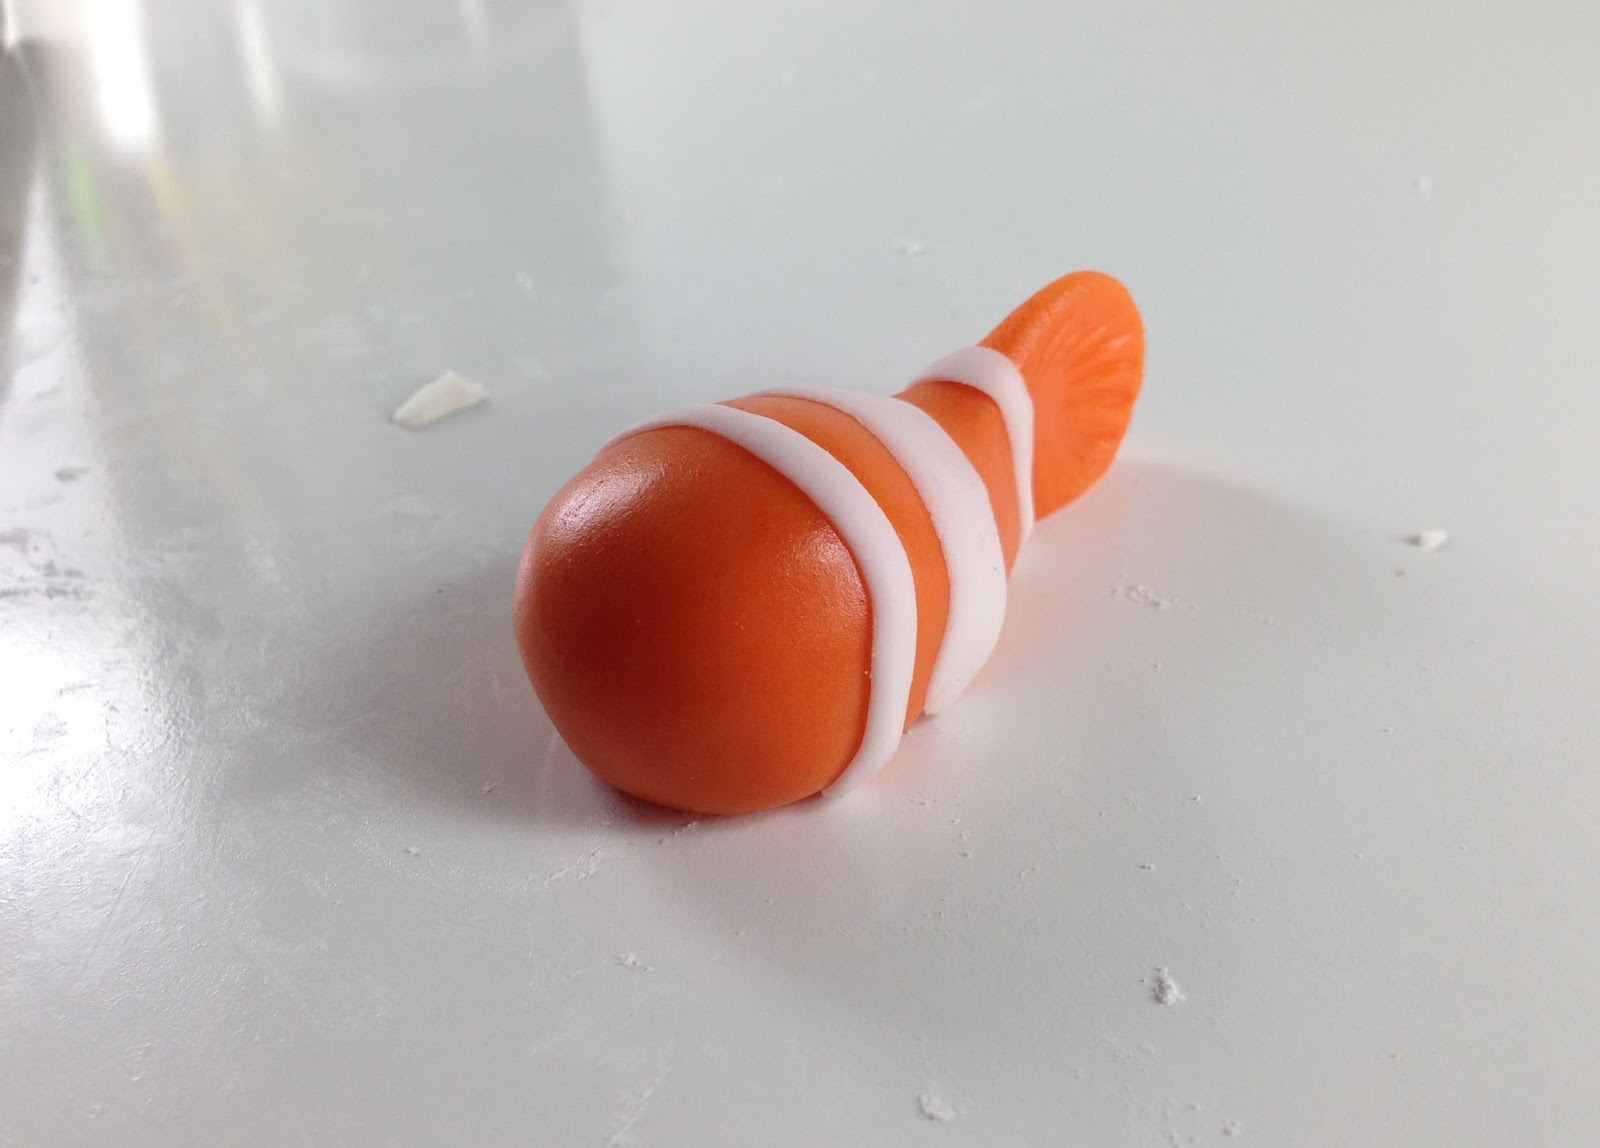
(1) Roll the orange fondant into a ball.
(3) Then roll it into an oval, one end noticeably smaller than the other.

(4) Pinch the small end and press the shell tool to the smaller end. This will be the tail.

(5) Create the clown fish’s stripes using white fondant
(6) Roll a small but a bit long cylinder, with one end smaller than the other.

(7) Press the shell tool on it.
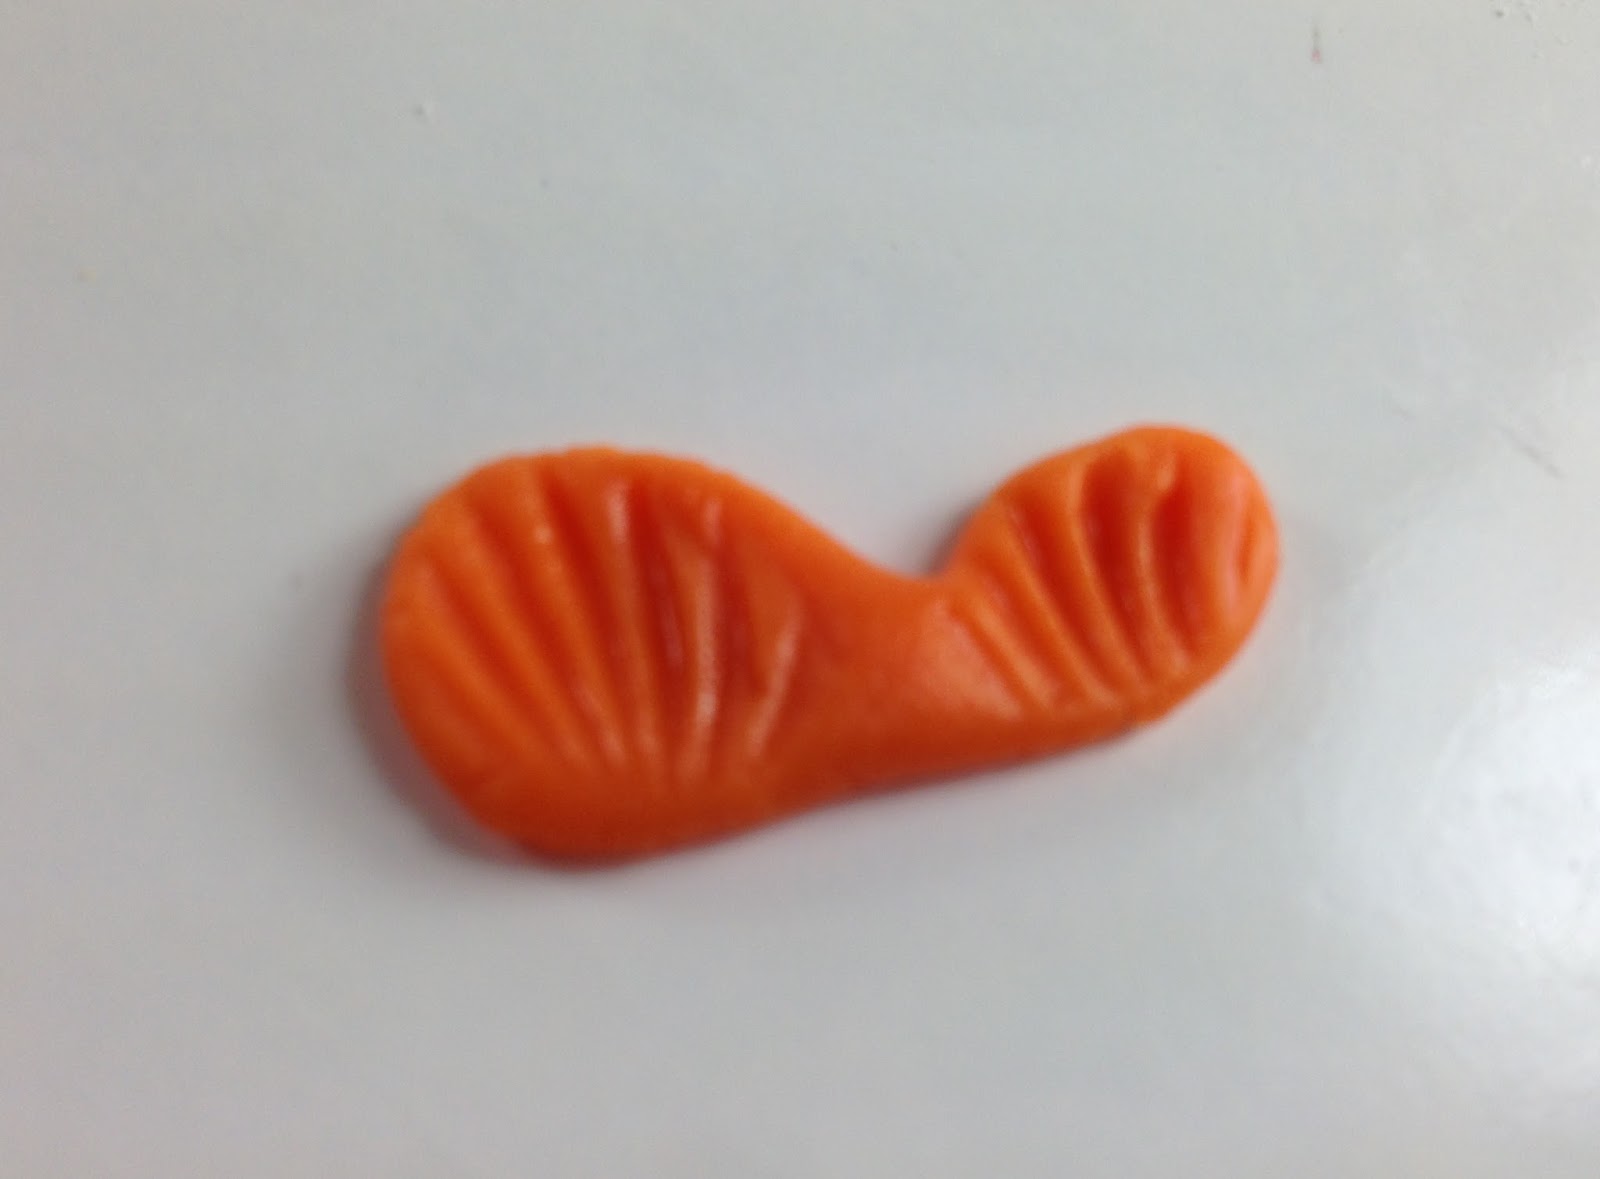
(8) Attach on top of the fish

(9) For the fins, roll 2 small orange fondant balls and press the shell tool on it.

(10) Attach of the sides.

(11) Add details on the face using the half moon fondant tool, the black dragees and white fondant.
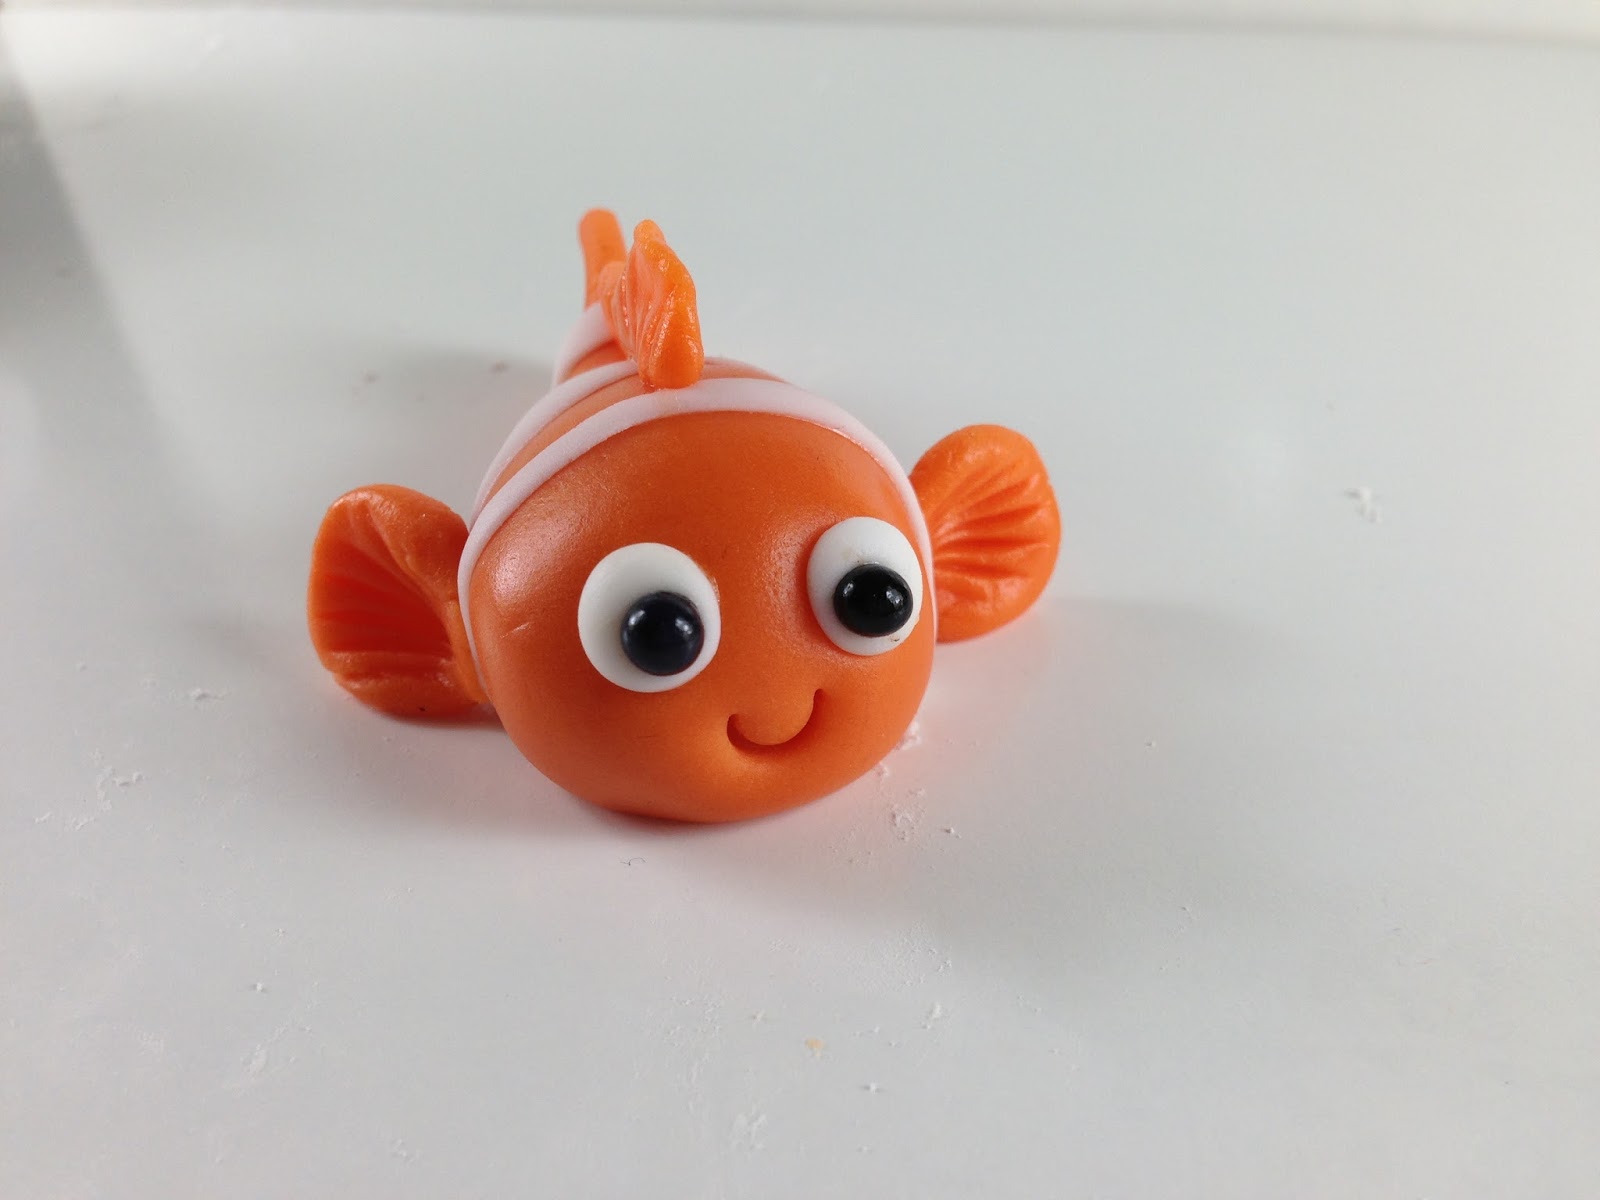
(12) Dip a small brush on the black gel fondant and add “outlines” on the fish.

Looks complicated, but really, it’s easy, right? ![]()

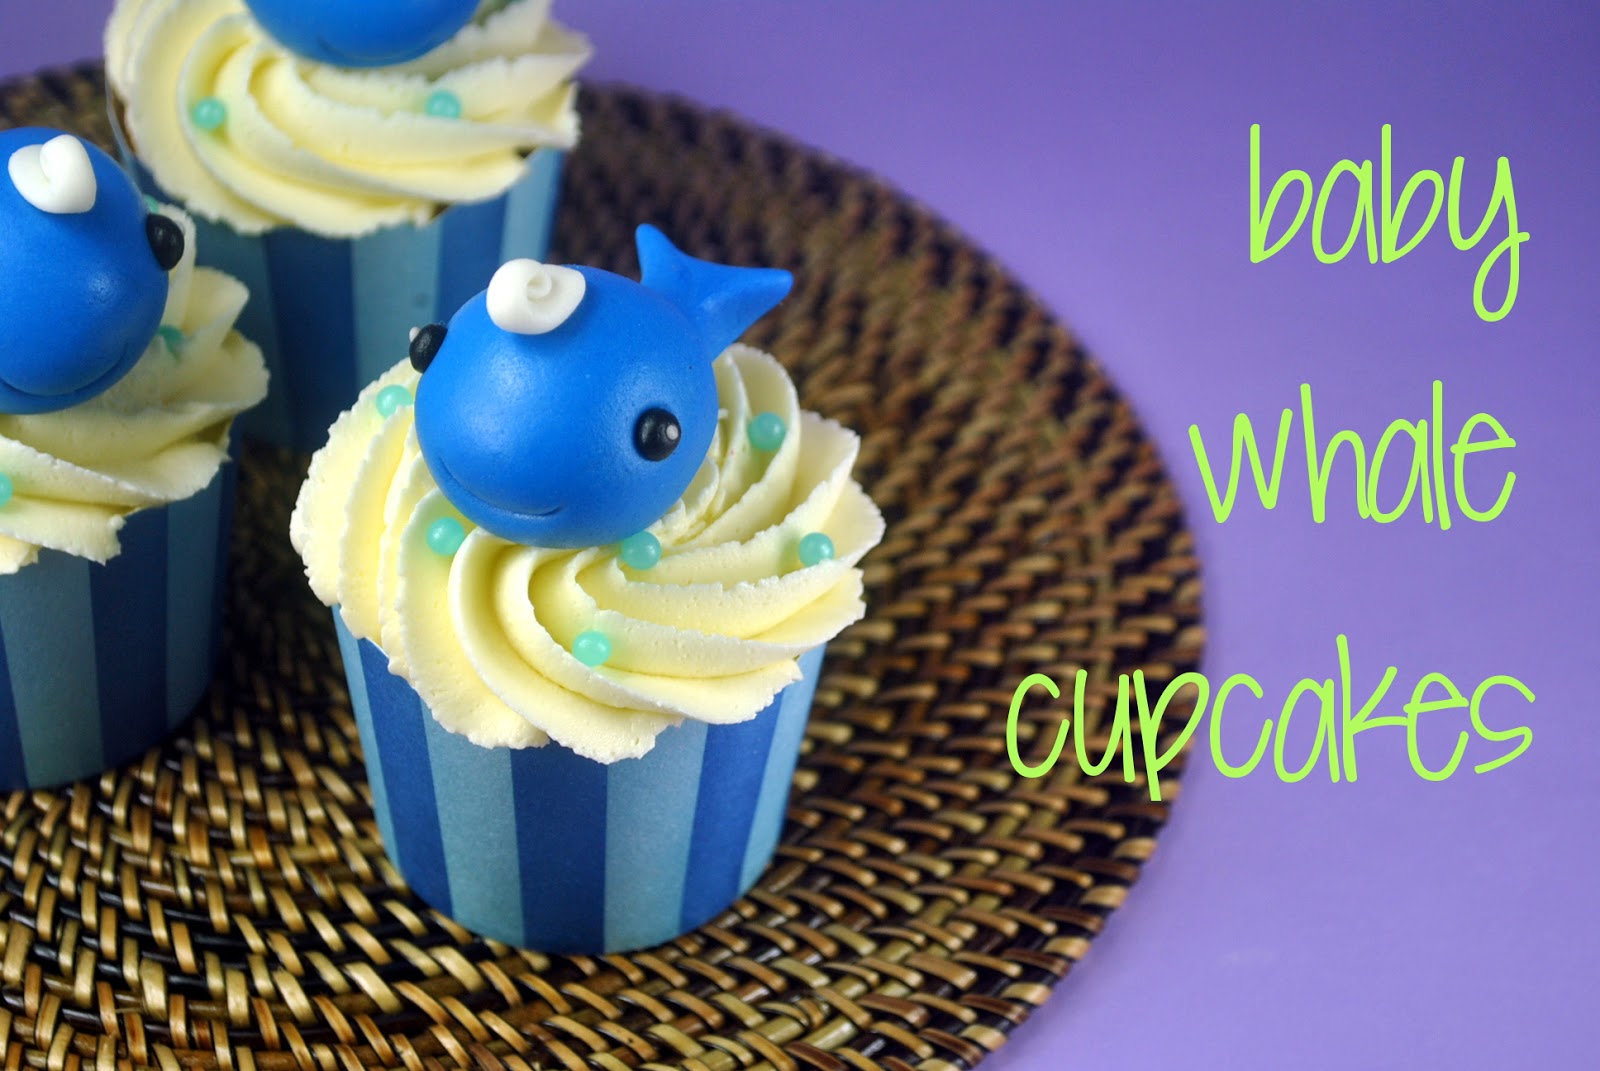
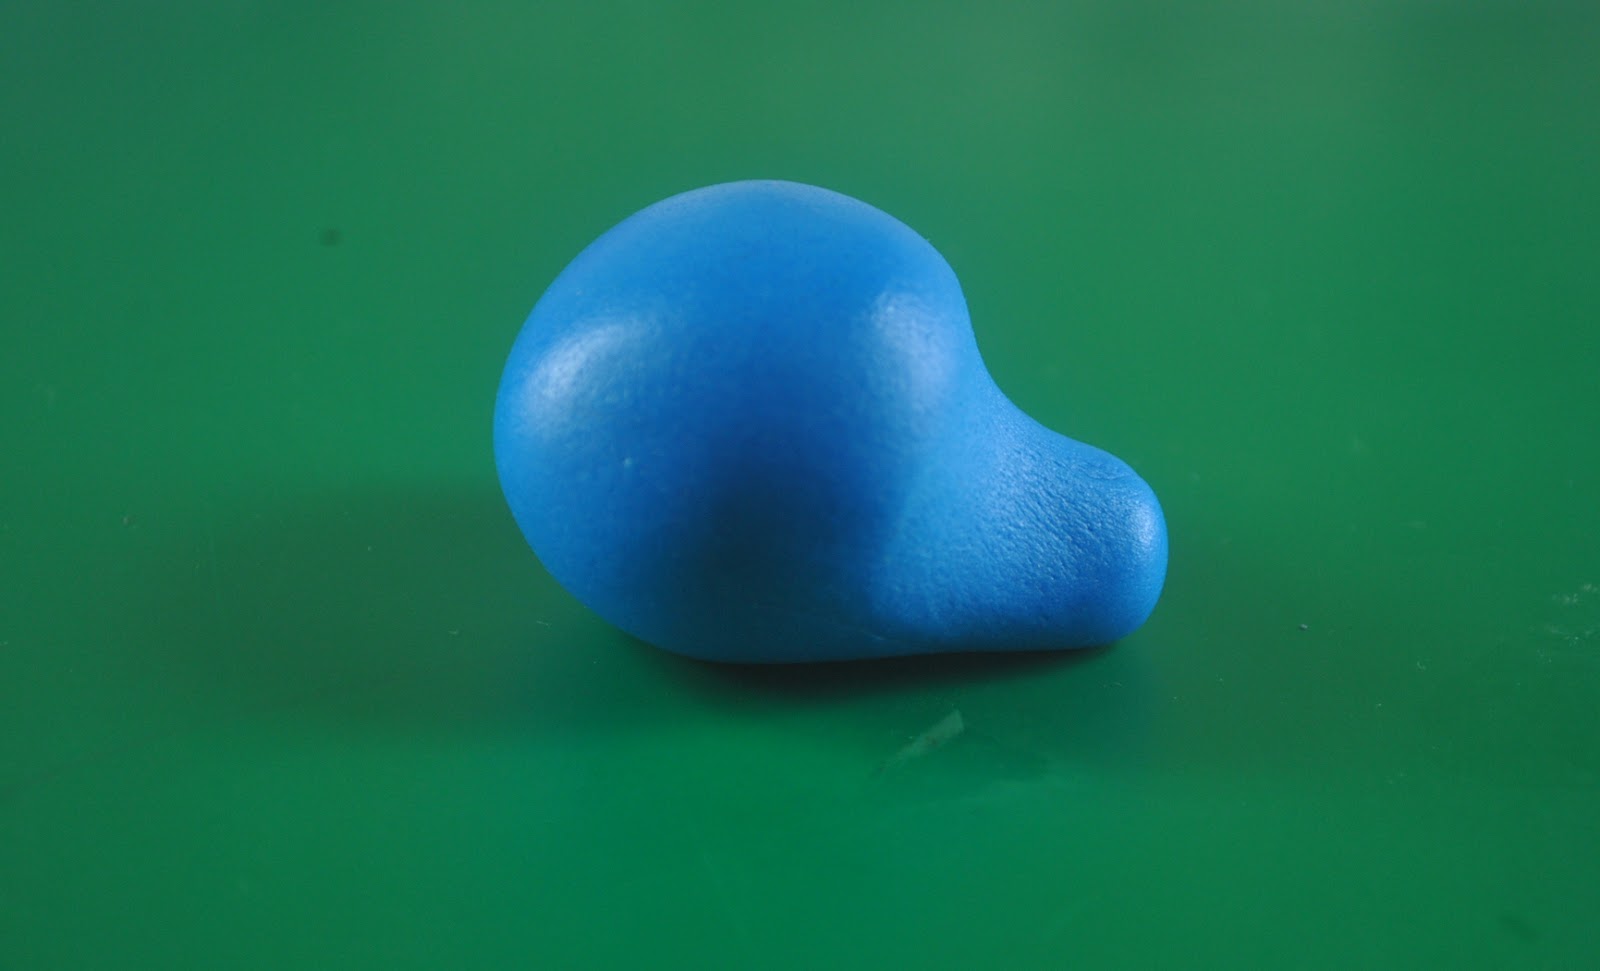
Here’s How:
(1) Roll blue fondant into a ball

(2) Press down one side and shape into a small whale tail
(3) Press the tail inward using the small round fondant cutter
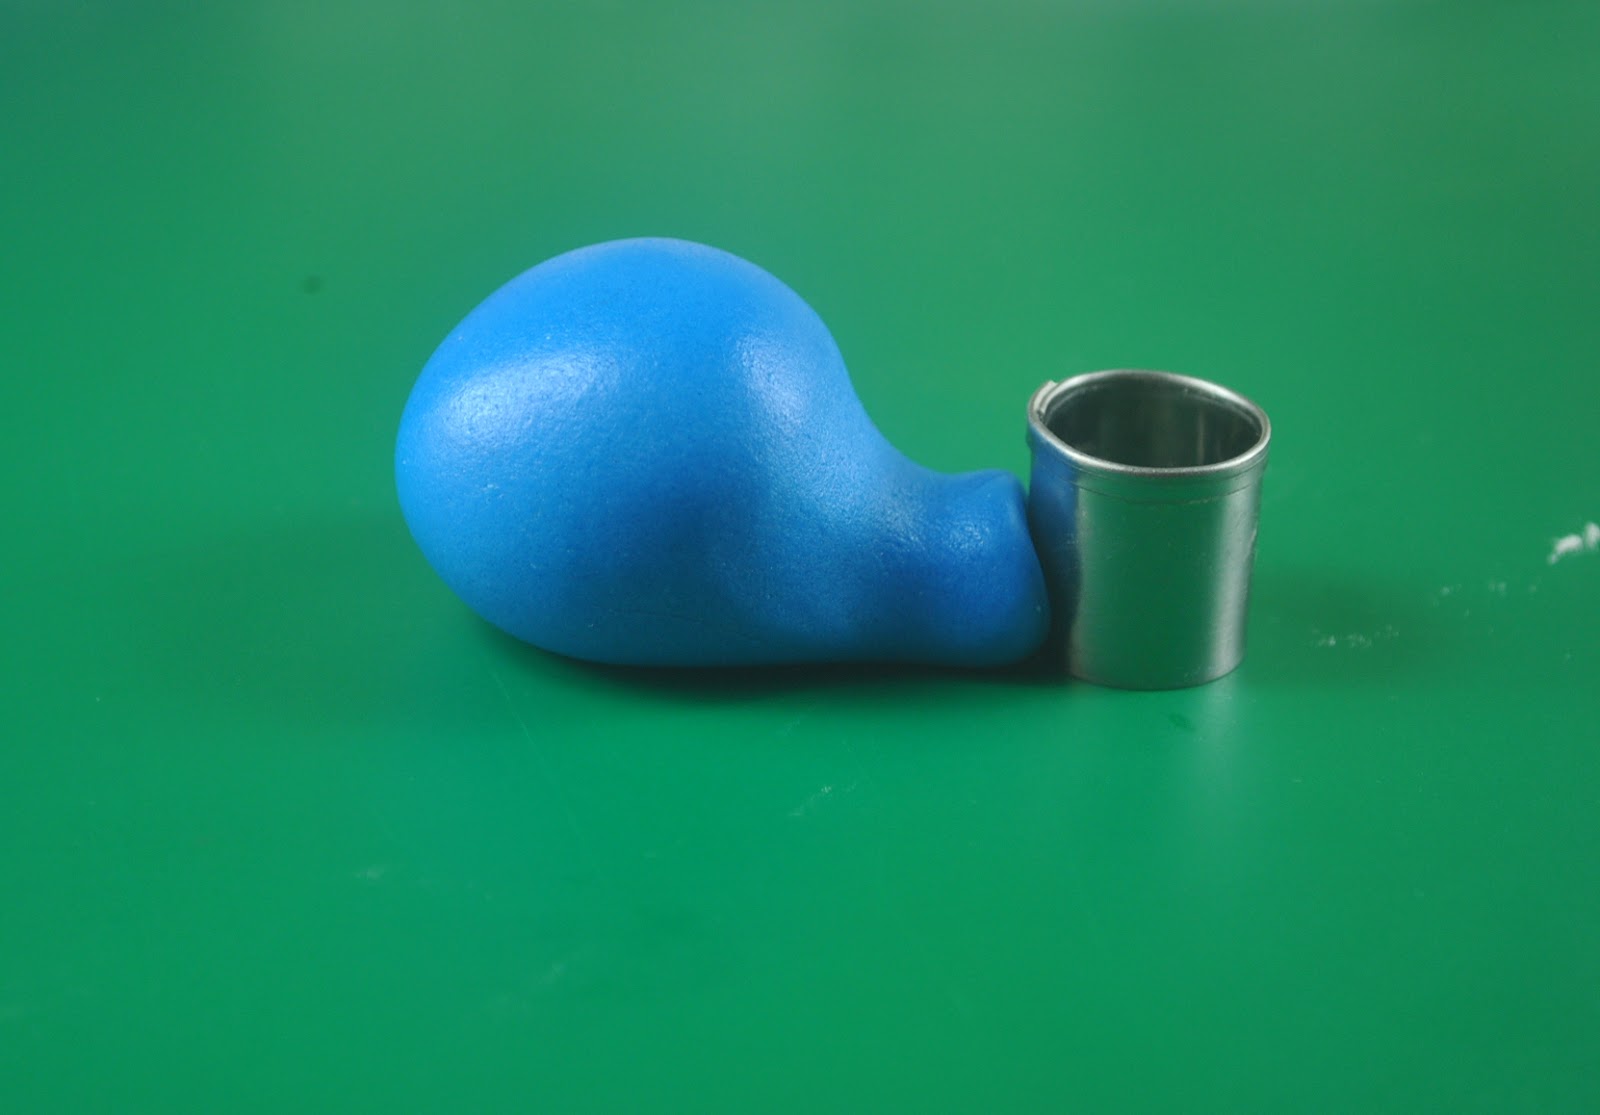
(4) Press the tail flat.

(5) Get some small white fondant into a long tear shape and roll it inwards and paste into the baby whale’s head. Using the fondant cutter, press a smile into the cute one.

(6) Add some eye details using the ball tool and the black fondant.

Adorbs… totally adorbs.

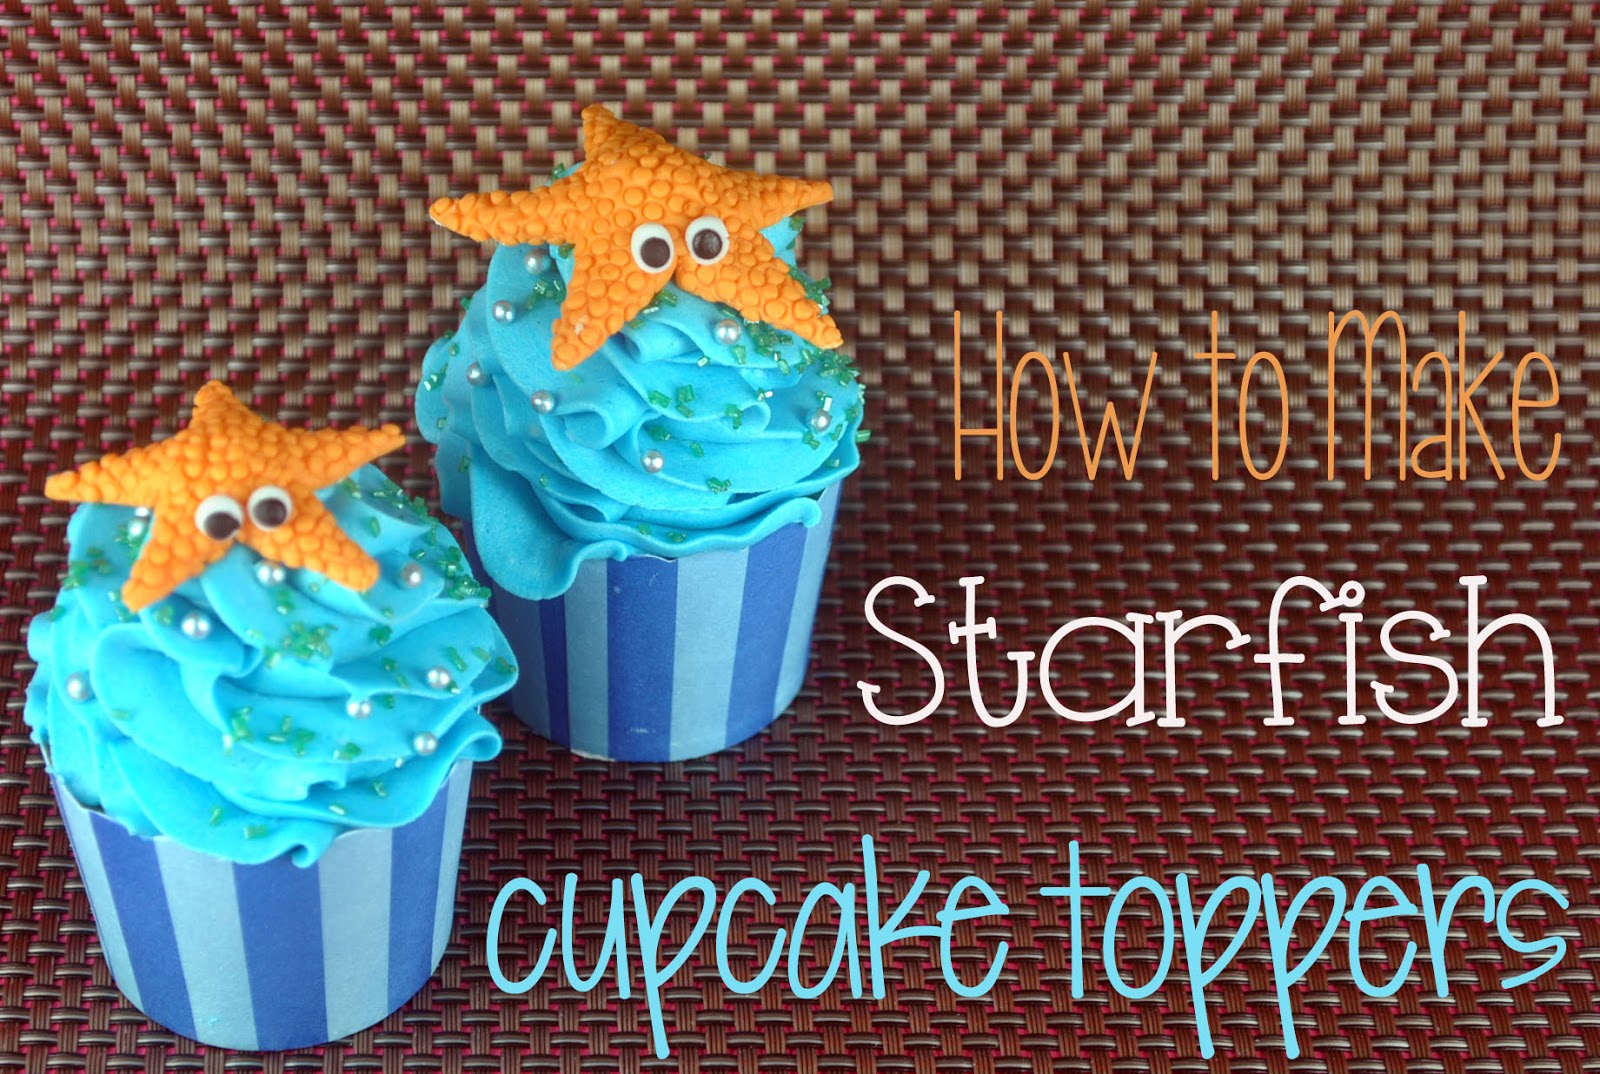
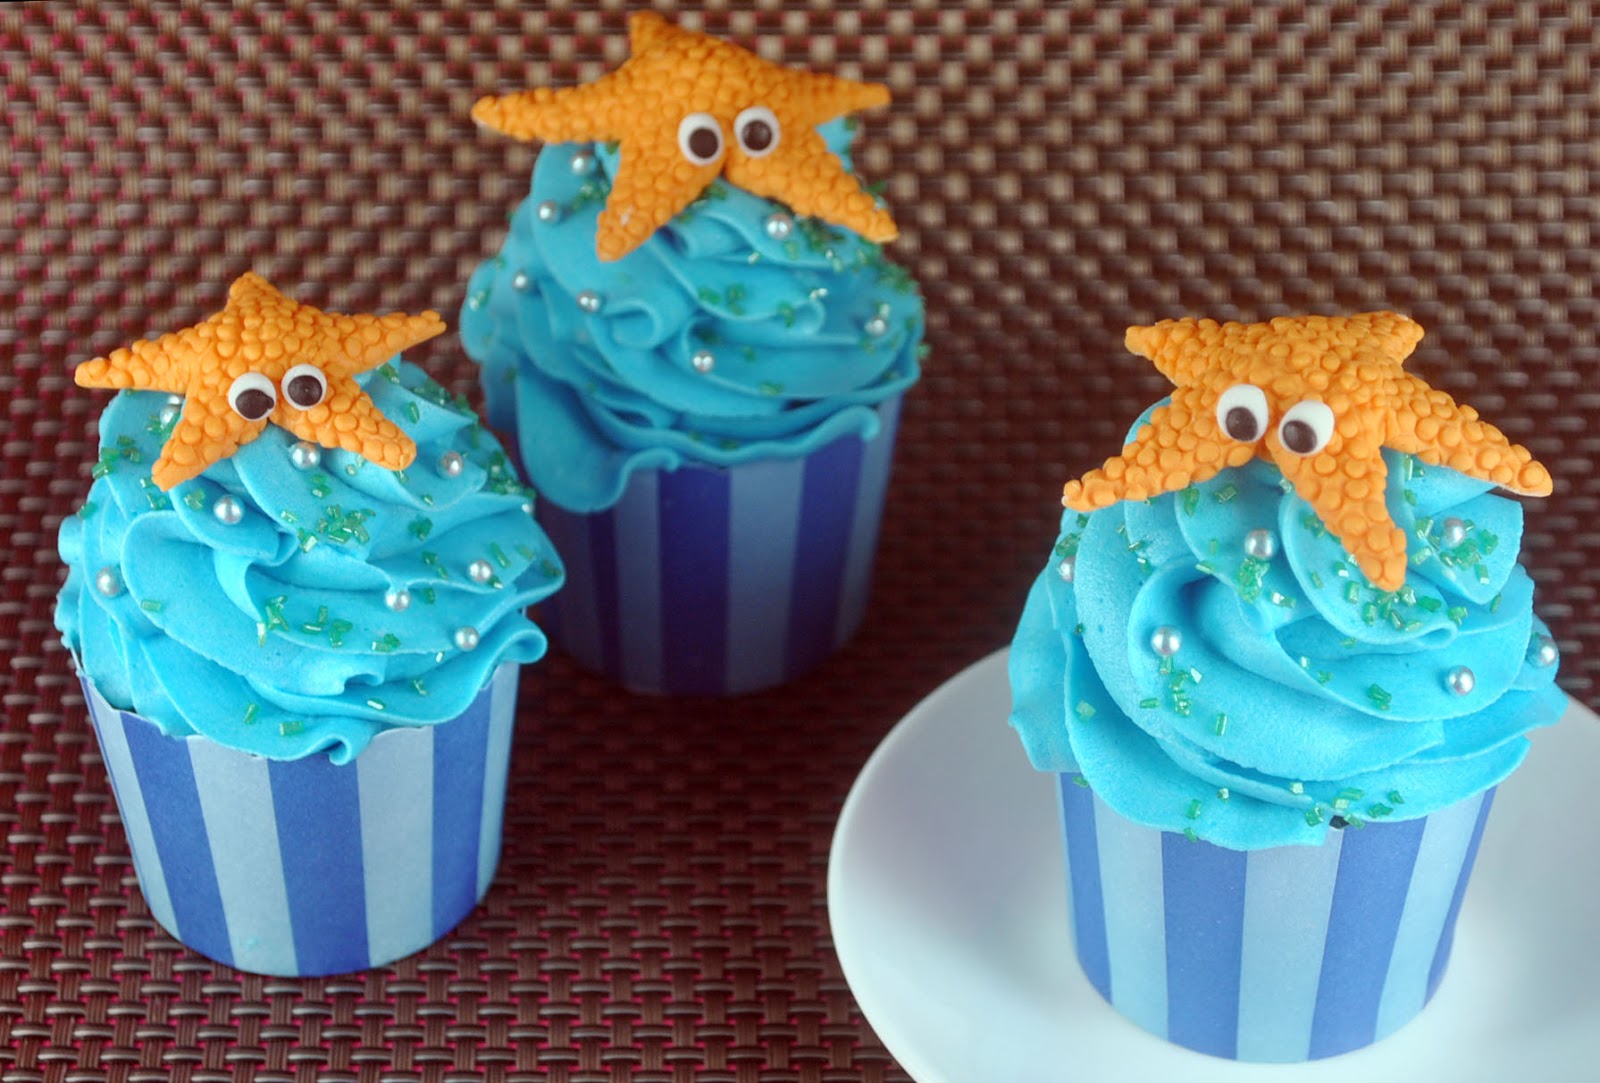
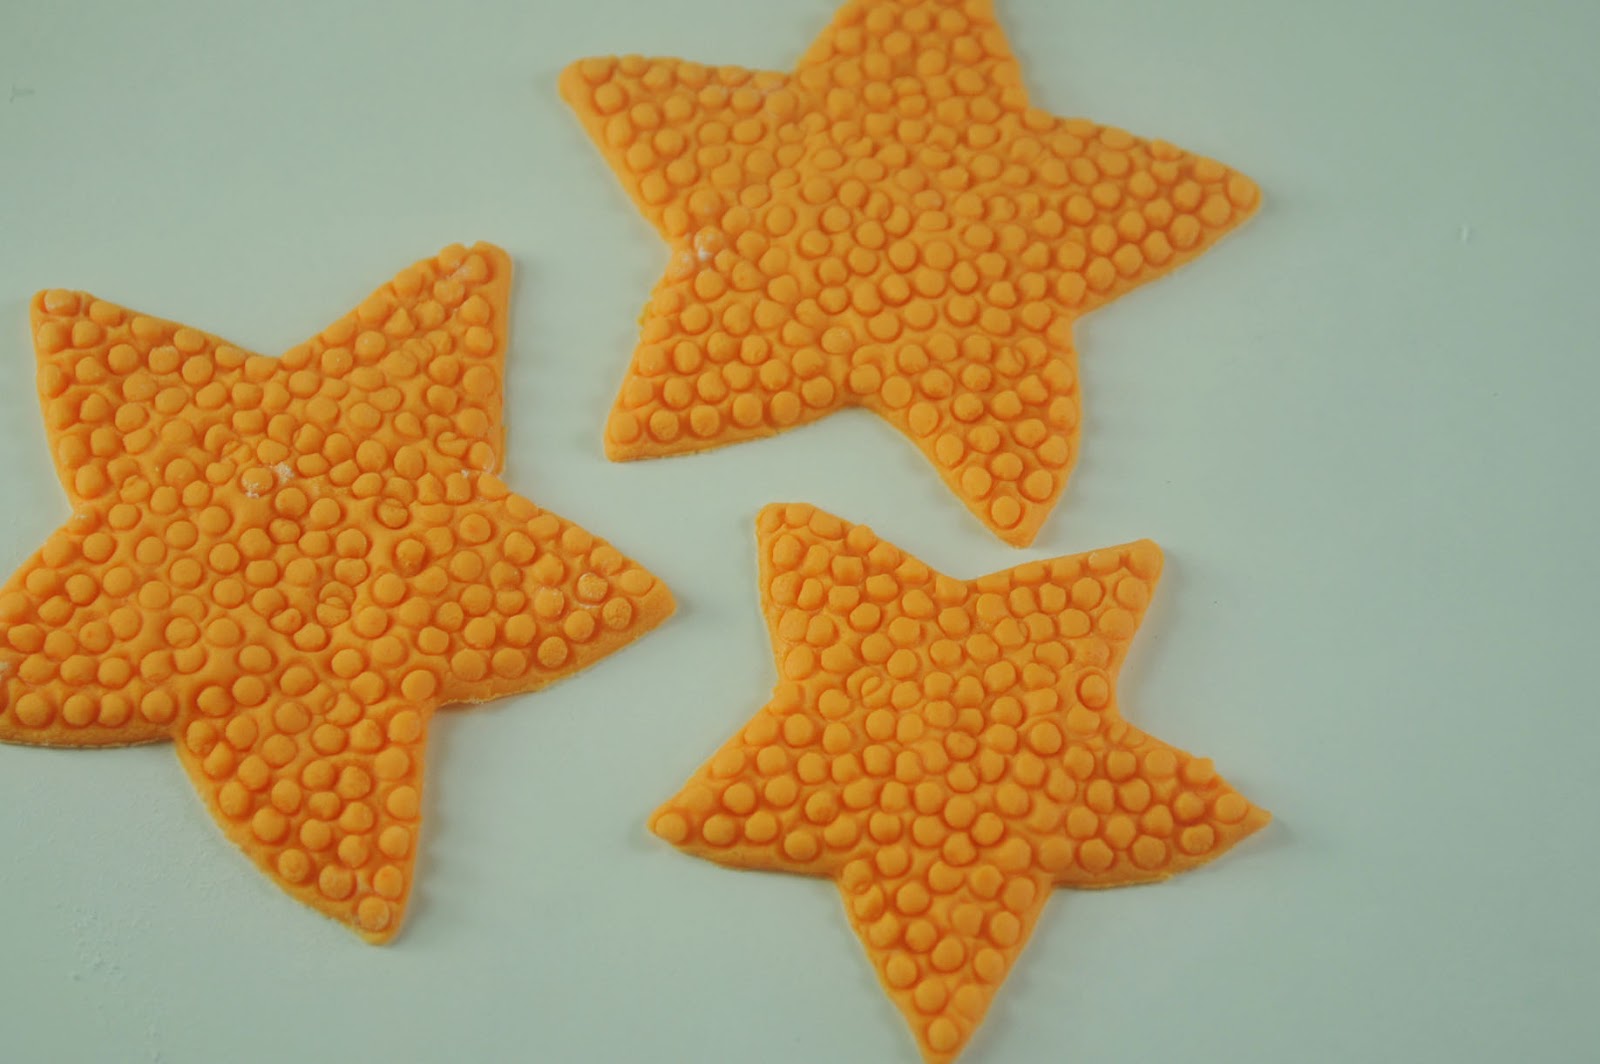
Fondant or Gumpaste Starfish Tutorial
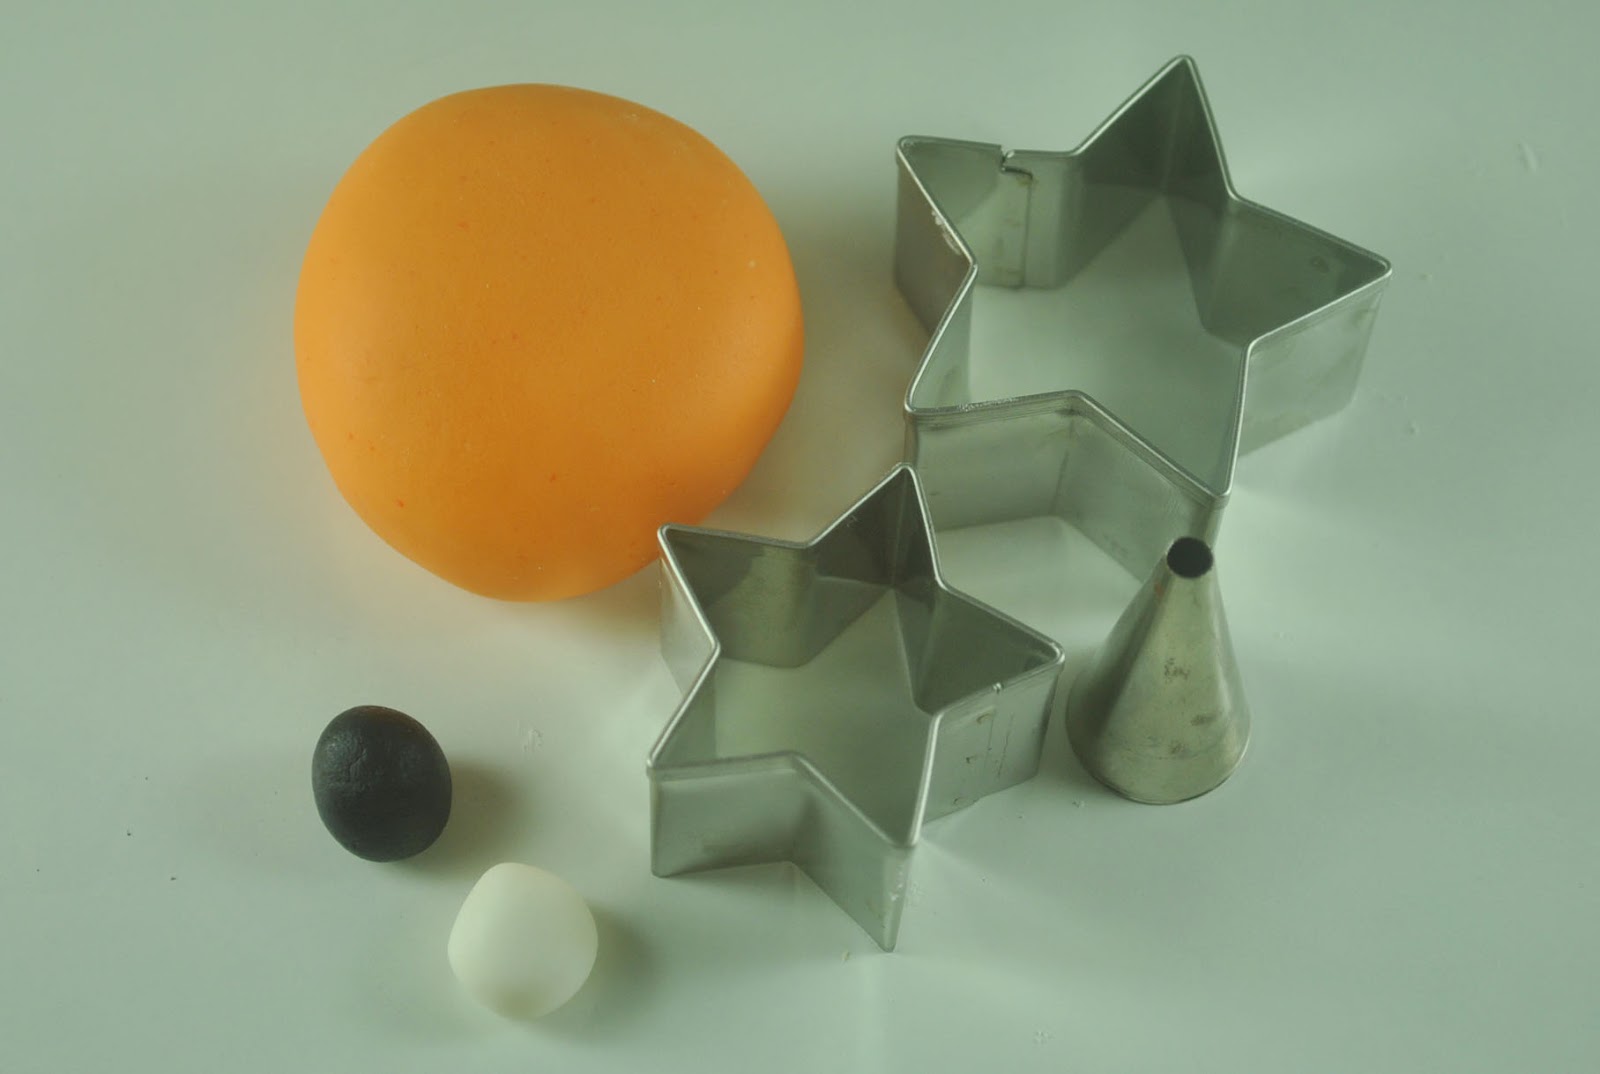
What we need
Fondant in orange (or any other color you want your starfish to be), white and black
Rolling pin
Star shaped fondant cutters
Small piping tip #4
Water and brush to glue things together
Here’s how:
(1) Roll orange fondant thickly, cut out stars using the fondant cutter

(2) Press circles on top to create texture on Mr Starfish
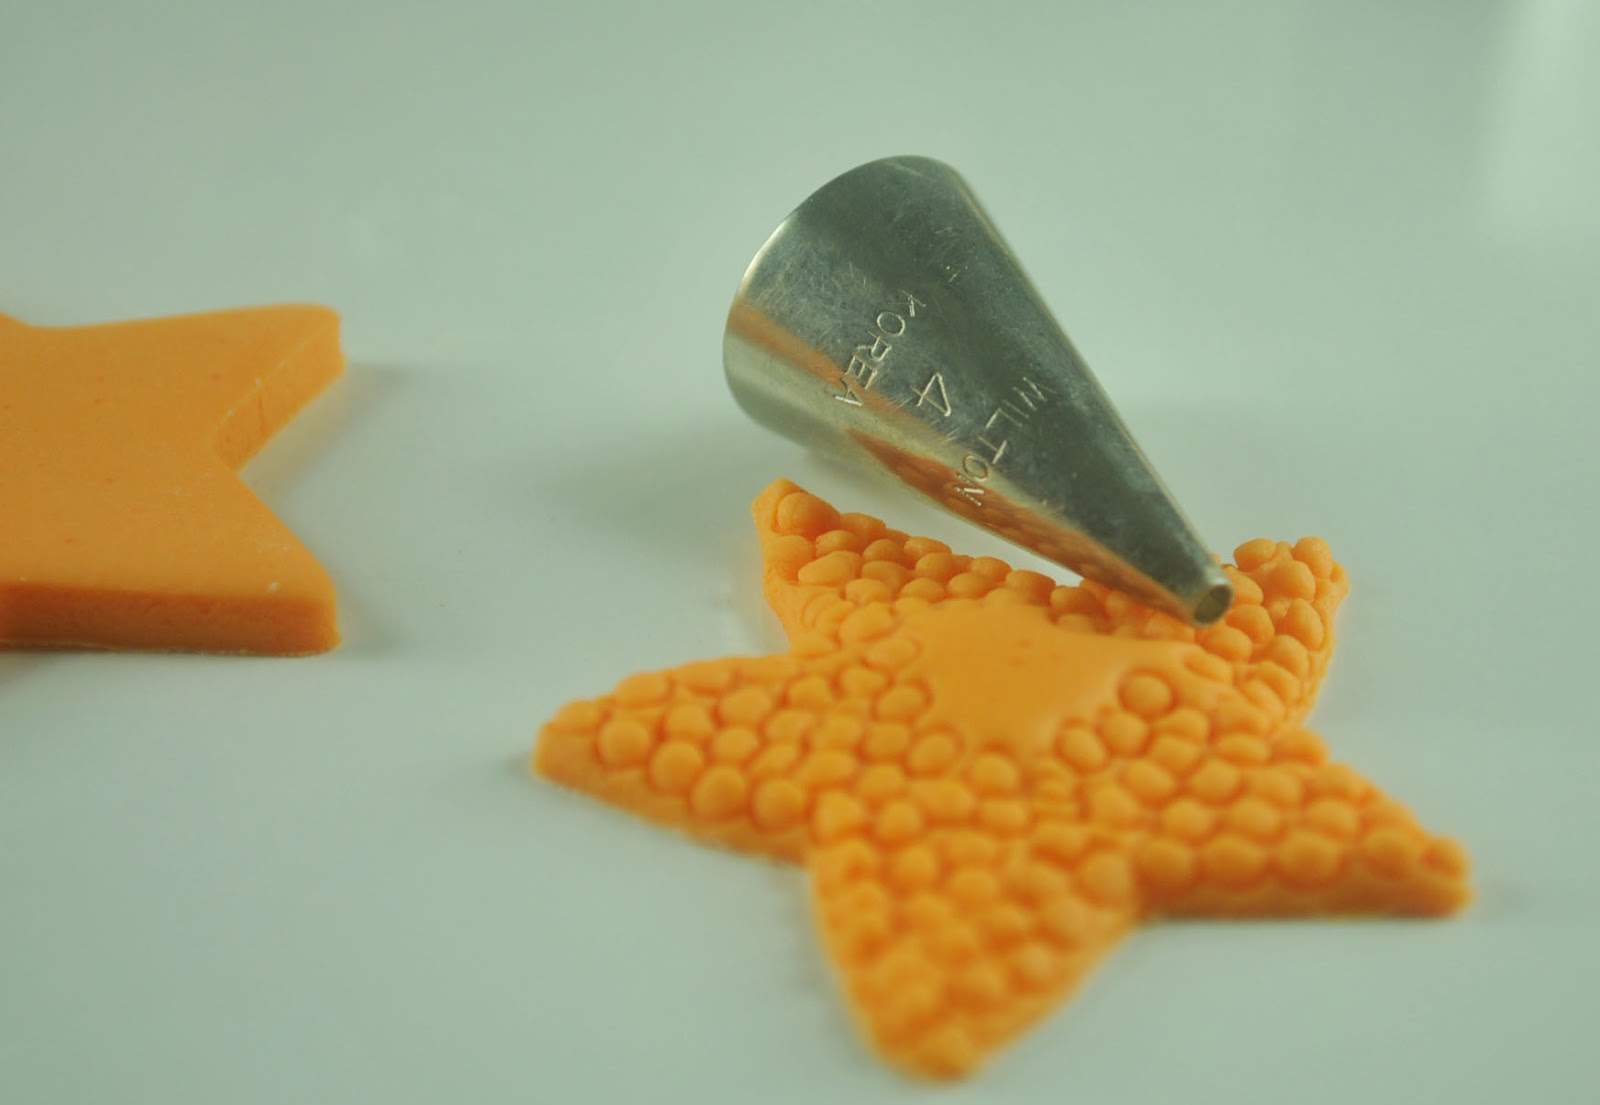
Here is how they will look like. Not to worry if the “star shape” was not retained during the process. It’ll come together later.
(3) Flip Mr Starfish over and lightly press a knife from the corners to the center. But just a bit,okay?
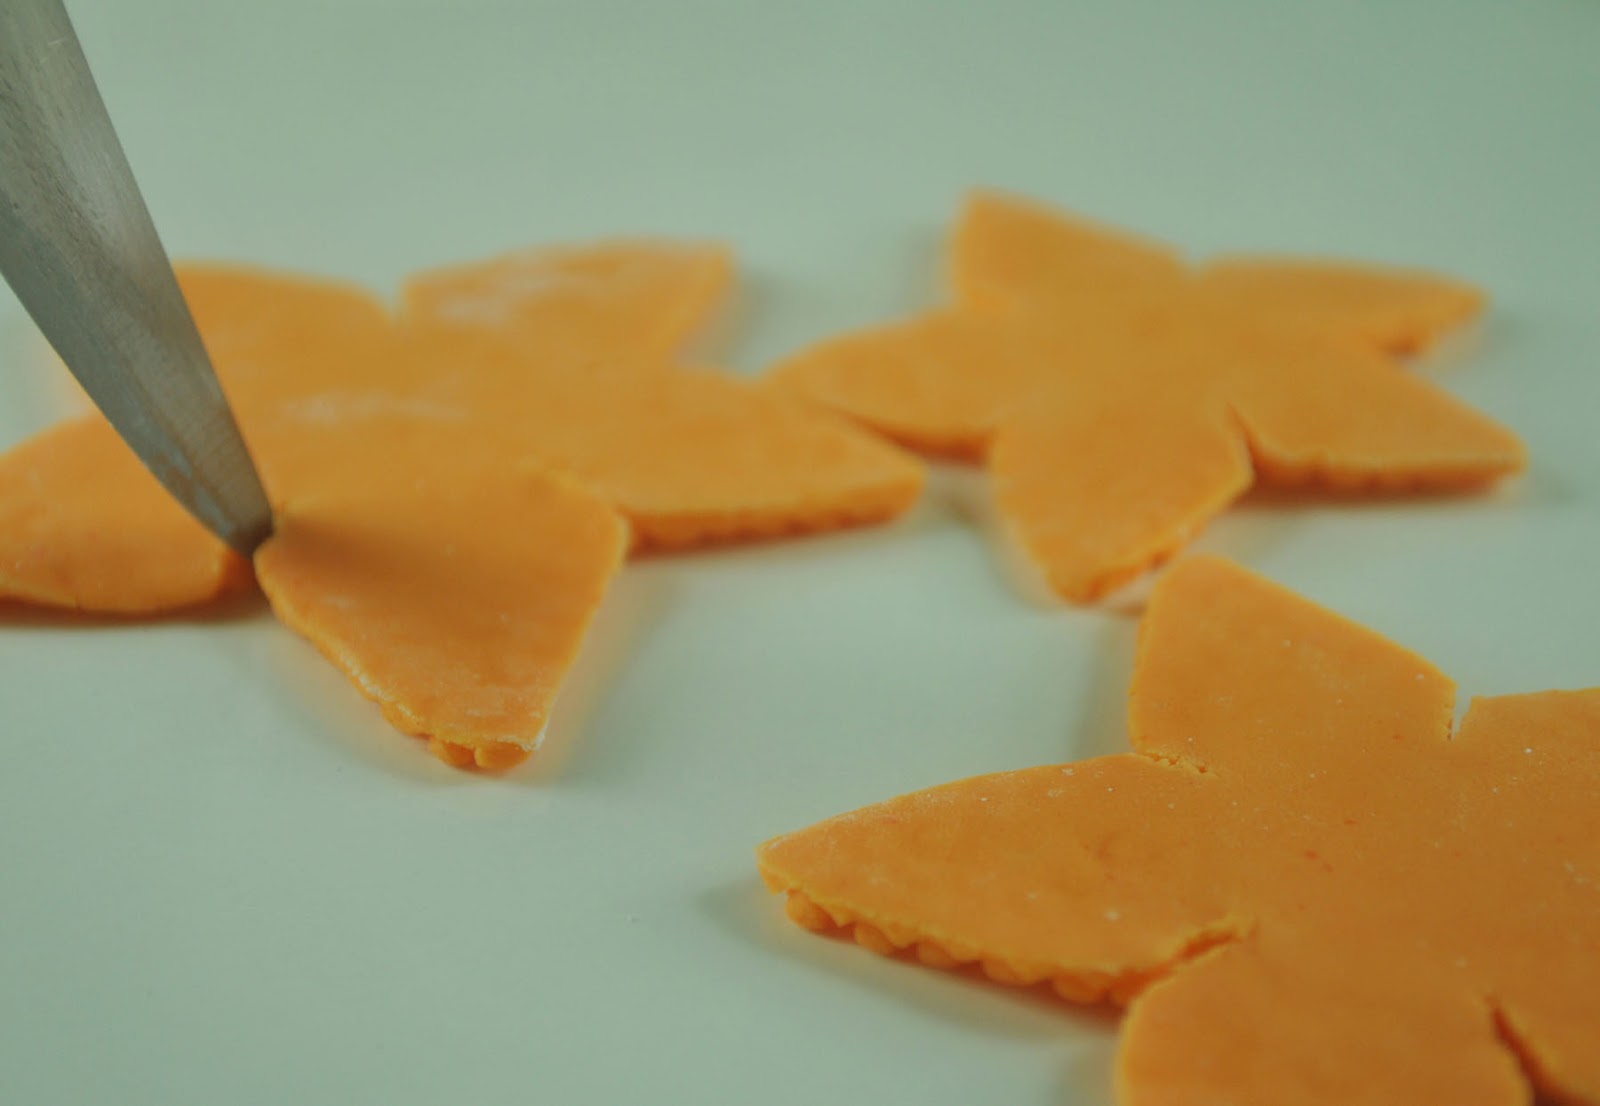
(4) Curl each ray (the “legs” of the starfish) together.
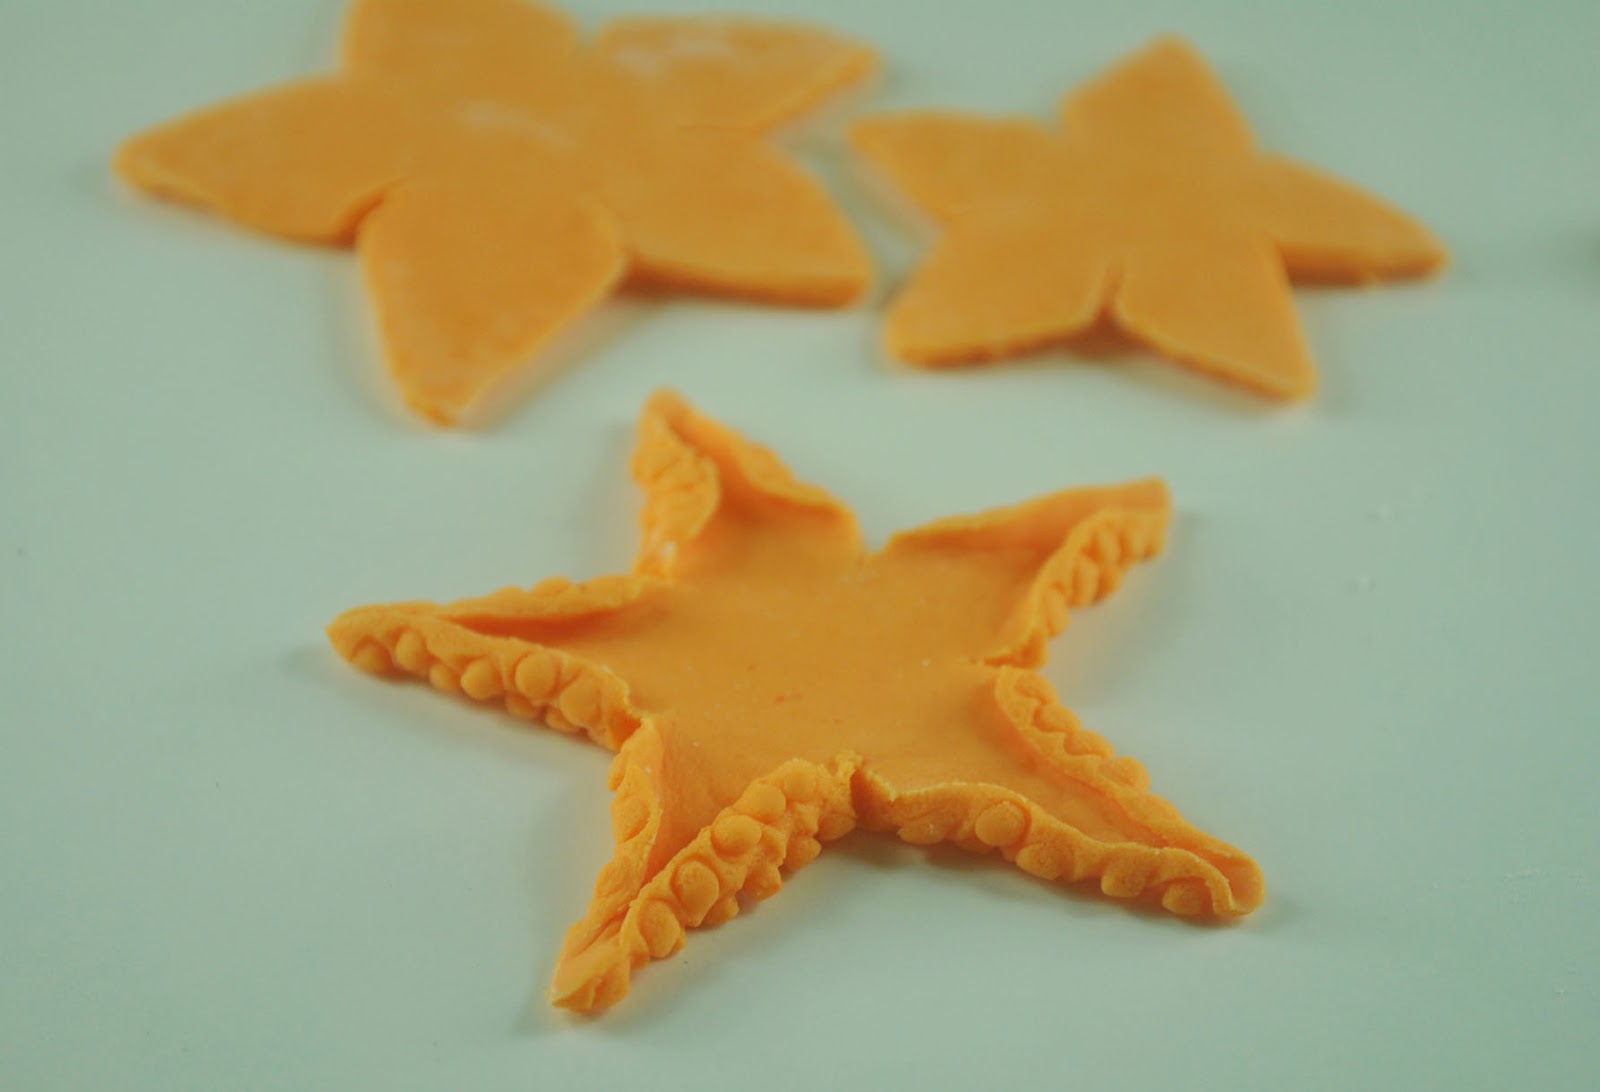
(5) Now, flip Mr Starfish over again. As you can see, he looks kind of flat. So go ahead and get some more orange fondant, fashion it into a ball.

(6) And paste it under the center of Mr Starfish.
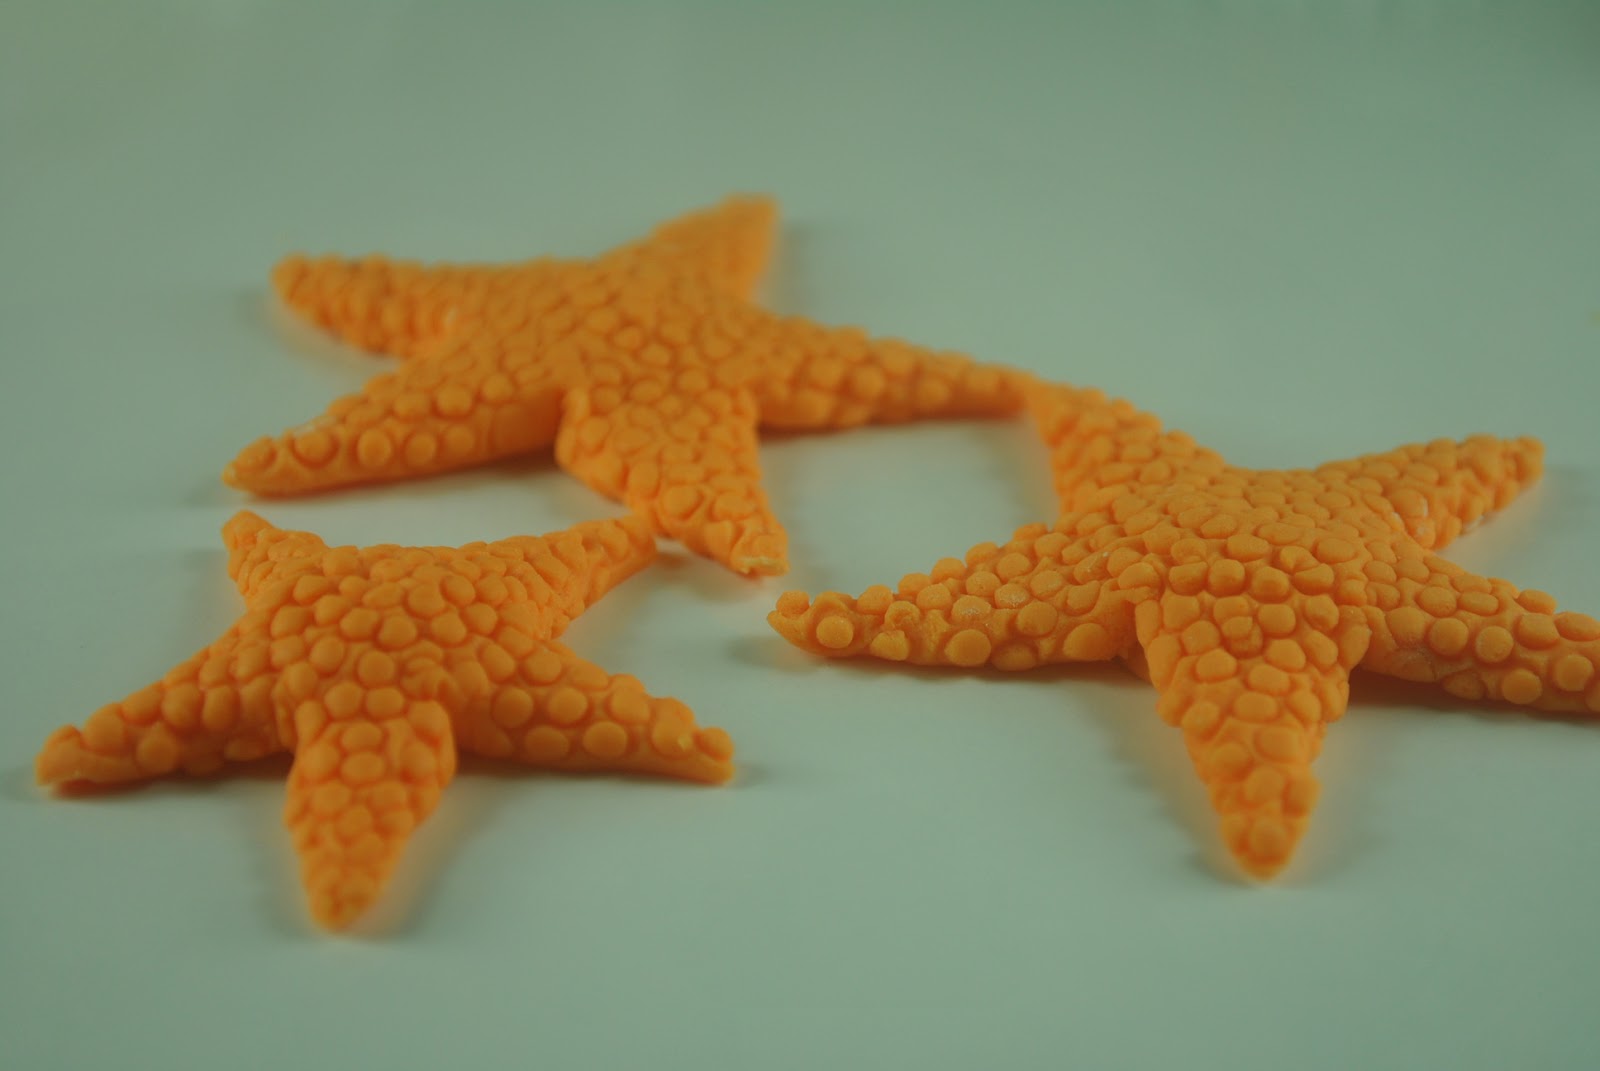
(7) Lastly, add the eyes.
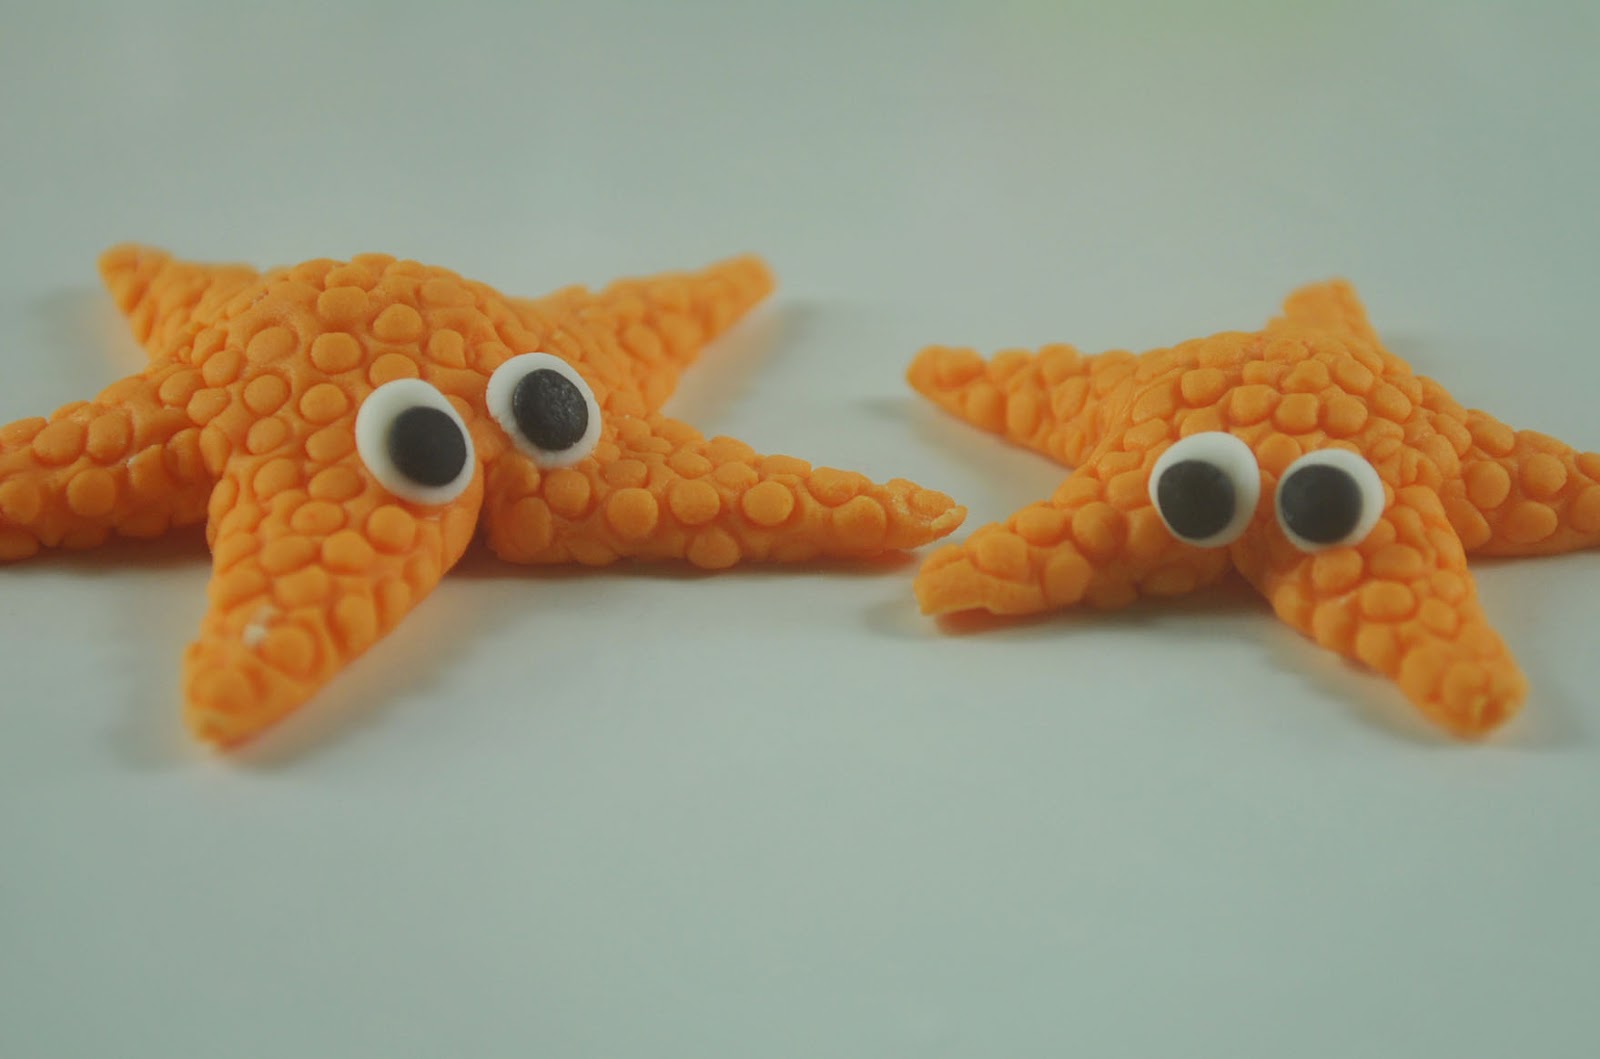
So, are we okay celebrating summer in October? ![]()
Aikko
Các tin cùng chuyên mục
Tự làm Gumpaste tại nhà - 27/12/2014 10:12Hướng dẫn làm hoa mao lương - Ranunculus Tutorial - 29/11/2014 12:25
Công thức tự làm sugarveil - 28/11/2014 10:15
Hướng dẫn cách trang trí bánh quy đơn giản cho valentine - 13/11/2014 12:57
Hướng dẫn nặn hình đôi bốt cho bé, yếm và bộ body - 13/11/2014 12:52
How to Quilt a Fondant Cake - 13/11/2014 12:51
Moroccan Cake + A Wafer Paper Flower Tutorial - 03/11/2014 08:53
Hướng dẫn phủ fondant làm xe ô tô minicooper - 19/08/2014 11:14
Cách làm hoa theo kiểu RUFFLE FLOWERL đơn giản - 17/08/2014 09:47
Hướng dẫn cách làm hoa bánh fondant chủ đề tím trắng - 17/08/2014 09:45
Hướng dẫn cách trang trí bánh fondant nông trại - 17/08/2014 09:42
Hướng cách nặn quần áo, giầy, váy em bé - 17/08/2014 09:40
Cách nặn fondant em bé - 17/08/2014 09:37
Hướng dẫn cách nặn fondant chim cánh cụt - penguin - 17/08/2014 09:35
Cách làm sushi đặt lên bánh - 07/07/2014 17:43
Bánh Sinh Nhật Gia Đình Chim Cúc Vàng: Ấm Áp Yêu Thương 11498Giá: 500.000 VNĐ
Bánh Sinh Nhật Cinnamoroll Hồng Pastel: Kỷ Niệm Ngọt Ngào Cho Sinh Nhật Bé Gái 11495Giá: 850.000 VNĐ
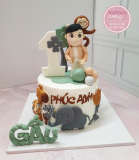
Bánh sinh nhật bé trai 1 tuổi đẹp với hình khỉ con và rừng safari 11497Giá: 500.000 VNĐ
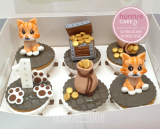
Bánh cupcake fondant mèo thần tài đẹp tặng bé trai 11496Giá: 35.000 VNĐ / Chiếc
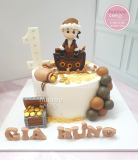
Bánh Sinh Nhật Bé Trai Truy Tìm Kho Báu – Phiêu Lưu Hấp Dẫn Bé Trai 1 tuổi 11494Giá: 500.000 VNĐ
Dạy làm bánh - Nhận đặt Bánh cưới, Bánh sinh nhật, Bánh Handmade 100% theo yêu cầu - Cung cấp nguyên liệu, dụng cụ làm bánh
Cơ sở 1: Số 65 Ngõ 111 Cù Chính Lan - Thanh Xuân - Hà Nội (Đến số 311 Trường Chinh - Ngã tư sở đi vào) (Xem bản đồ)
Cơ sở 2: Số 10A Tràng An - phường Tân Thành - Thành phố Ninh Bình. ( Đối diện hồ Kỳ Lân) ( Xem bản đồ)
Điện thoại : 03.666.22.666 (Viber/Zalo) - 08.5622.5622 - 0983.002.989 (WhatsApp)
Số TK: 10524948099011 - Chủ TK: Mai Thu Trang - Ngân Hàng: Techcombank - Hà Nội.
Số TK: 0021001040845 - Chủ TK: Mai Thu Trang - Ngân Hàng: Vietcombank - Hà Nội .
Email: hunniecakehn@gmail.com
--------------------------
|
Cửa hàng bánh Hunnie Cake |